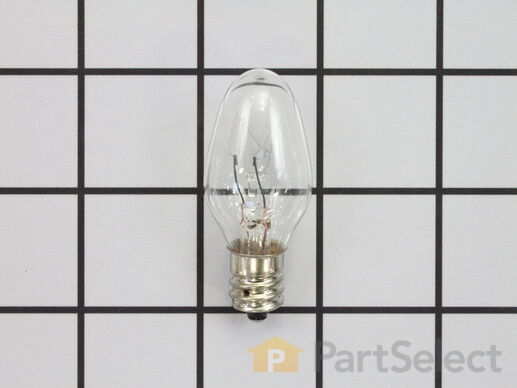
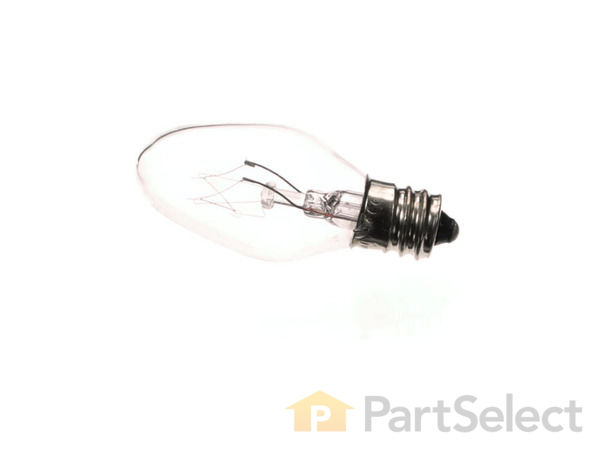
Part Location Diagram of WP22002263 Whirlpool Light Bulb - 10W
See part 33 in the diagram
Replacing your Whirlpool Refrigerator Light Bulb - 10W
( Grid squares measure 1x1 inch )
Customer Service Representative

Get in touch, we're here to help!

Monday to Saturday
8am - 9pm EST

customerservice@partselect.com

Light Bulb - 10W WP22002263

★★★★★
★★★★★
16 Reviews

Rated by 19 customers 

Easy 

30 - 60 mins 

Ratings submitted by customers like you who bought this part.

$ 16.30
  In Stock
Get FREE EconoShip on orders over $100! T&C apply

Get this part fast! Average delivery time for in-stock parts via standard shipping: 1.8 days.

Does this part fit my model?

Need help finding your model number?
PartSelect Number PS11739347
Manufacturer Part Number WP22002263
Manufactured by Whirlpool for Whirlpool, Kenmore, KitchenAid, Maytag
Product Description

Light Bulb - 10W Specifications

This ten watt appliance light bulb is two inches tall. It is used with both washers and dryers.
How Buying OEM Parts Can Save You Time and Money

How Buying OEM Parts Can Save You Time and Money

Part Videos

Replacing your Whirlpool Refrigerator Light Bulb - 10W

Replacing your Whirlpool Refrigerator Light Bulb - 10W
Troubleshooting
This part works with the following products:
Refrigerator, Dryer, Washer Dryer Combo, Wine and Beverage Cooler.
Part# WP22002263 replaces these:
AP6006279, 14200559, 14201091, 14210279, 14212817, 14218420, 17512, 18445, 21074, 21120, 22002263, 245535, 262465, 263313, 28329, 3178641, 3406124, 3406125, 3406126, 35001138 , 4159007, 4173328, 4323686, 4343839, 4344602, 4344740, 4350095, 4352209, 4713-001199, 528513, 550025, 790862, 790871, 8206780, 851389, W10299463, W10809512, W11385701, WP22002263VP Show less
Back to Top
Customer Reviews
Average Rating:
★★★★★
★★★★★
16 Reviews
3.9
Filter By Rating:
  • 5 Stars
    10
  • 4 Stars
    2
  • 3 Stars
    0
  • 2 Stars
    1
  • 1 Star
    3
Sort by:
  • 1
  • 2
Sorry, we couldn't find any existing reviews that matched. Try using some different or simpler keywords.
  • 1
  • 2
Customer Repair Stories
 Average Repair Rating: 3.2 / 5.0, 19 reviews. What's this?
Sort by:
  • 1
  • 2
Sorry, we couldn't find any existing installation instruction that matched.
Dryer won’t start
Drum belt broke. Found drive shaft belt guide broke. Replaced pulley wheel since I had it apart.
Other Parts Used:
Thermostat, Internal-Bias Light Bulb - 10W
  • Kyle from HANOVER, IL
  • Difficulty Level:
    Really Easy
  • Total Repair Time:
    30 - 60 mins
  • Tools:
    Nutdriver, Socket set
1 of 2 people found this instruction helpful.
Was this instruction helpful to you?
Thank you for voting!
Bulb worked for a couple days and has now burned out, filaments dangling
To replace the light bulb, I removed the screw and the cover, unscrewed the old bulb, replaced with the new bulb and replaced the cover, securing it with the small screw. It worked appropriately with normal use for a few days and then I noticed the light was not coming on when I opened the door.

I removed the cover and pulled out the bulb to find that the filaments inside are dangling and burned through. I need them replaced, please.
  • Amy from JUNCTION, TX
  • Difficulty Level:
    Easy
  • Total Repair Time:
    Less than 15 mins
  • Tools:
    Screw drivers
2 of 3 people found this instruction helpful.
Was this instruction helpful to you?
Thank you for voting!
My dryer would get hot, but not stay hot enough to dry the average load
1st I unplugged the dryer.
I reviewed the awesome blueprint that I printed out of my specific model , which is provided by this great website. I located each area that I would need to make the replacement of parts, by highlighting it on the blueprint. I removed the nut at the dryer light, inside the dryer. Removed the light cover & replaced the bulb, put the cover back on, tighten the nut.
I removed all the nuts from the back, remove the exhaust tube, removed the rear panel. I realized that the exhausted tube was kind of heavy. It was extremely clogged with lint so thick , I couldn't see through it & it was also holding water that weighed down the exhaust tube. So disgusting !! I immediately went to my HomeDepot to purchase a new 8' foiled exhaust tube & 2 elbow connectors. Installed it & reused the tightening clamps at each elbow . Wasn't expecting any of this in the plan. I realized that this was probably the culprit of the steamy dryer. I put the rear panel on, without installing the other two parts that I purchased. I put at load of wet laundry in the dry & ran it. The load was completely dry in the first cycle. Problem solved. I would like to say that this website gave me the resources, knowledge & confidence to believe that I could make the repair myself & that was the only reason I moved forward to complete the task. In a sense, this company has saved me,my family & our home from a potential fire. So people of the world please take the time to check your air flow visually inside the exhaust tube . Thank You PartSelect ??
Other Parts Used:
Thermal Cut-Off Fuse Kit Dryer Thermal Fuse Light Bulb - 10W
  • Lisa from BLACK JACK, MO
  • Difficulty Level:
    Really Easy
  • Total Repair Time:
    30 - 60 mins
  • Tools:
    Nutdriver, Screw drivers
2 of 4 people found this instruction helpful.
Was this instruction helpful to you?
Thank you for voting!
Replaced bulb, door switch and heating element.
I followed the instructions that I watched on the video. The video was very helpful.
Other Parts Used:
Dryer Door Switch Light Bulb - 10W Heating Element - 240V 5400W
  • Morris from ODESSA, TX
  • Difficulty Level:
    Really Easy
  • Total Repair Time:
    30 - 60 mins
  • Tools:
    Screw drivers, Socket set
3 of 3 people found this instruction helpful.
Was this instruction helpful to you?
Thank you for voting!
Dryer switch was broken
I just followed the instruction in the video, step by step. Easy as pie. Took out the screws, raised the top, unplugged the switch, took it out, put the new one in. Then reversed the process and put it all back together. Of course, always unplug the dryer from the wall plug before you do anything. The light bulb wasn't bad and came back on when I replaced the door switch. Now I have a replacement if it goes out.
Other Parts Used:
Dryer Door Switch Light Bulb - 10W
  • Gina from ATHENS, TN
  • Difficulty Level:
    Really Easy
  • Total Repair Time:
    15 - 30 mins
  • Tools:
    Screw drivers
2 of 2 people found this instruction helpful.
Was this instruction helpful to you?
Thank you for voting!
THE SHUTE WAS FREEZING UP BLOCKING THE ICE FROM DROPPING
Using the Ice Door Kit we replaced the parts from the kit. There were a could of tricky things that were not in the video. The face of the freezer above the ice maker came down "like a guillotine" on my husbands hands so I recommend taping it to the top of the door prior to removing the whole door unit. He said it was also more complicated getting the pin off so this took some time and ours did not look anything like the ones in the video. Also, there was quite a bit of mold which took some time to clean out all the way before reassembly. Glad we did it though! Our fridge is still beautiful Stainless Steel and we paid extra for Counter Depth so this was a say cheaper alternative than replacing the whole thing.
Other Parts Used:
Light Bulb - 10W Ice Door Kit
  • Patiricia from AUSTIN, TX
  • Difficulty Level:
    A Bit Difficult
  • Total Repair Time:
    1- 2 hours
  • Tools:
    Pliers, Screw drivers
1 person found this instruction helpful.
Was this instruction helpful to you?
Thank you for voting!
Dryer continued spinning when door was open. Light was out.
Unscrewed two screws at dryer vent. Popped dryer top. Unscrewed two screws to door sensor. Disconnected sensor. The rest is history.
Other Parts Used:
Dryer Door Switch Light Bulb - 10W
  • Christian from SAVANNAH, GA
  • Difficulty Level:
    Very Easy
  • Total Repair Time:
    Less than 15 mins
  • Tools:
    Screw drivers
1 person found this instruction helpful.
Was this instruction helpful to you?
Thank you for voting!
noisy drum opreation
Opening the cabinet allowed for a through examination and listing of the worn components: 1 defective idler and mounting shaft, 1 worn drive belt, 2 sagging felt seals, 1 worn glide surface, 1 dead light bulb. Replacement parts arrived in two days. After a through vacuuming, reassembly was a snap. Both roller/shafts and glide pads were replaced as matched pairs. Unit operates now as factory new. I am not a trained repair person but simple logic, sufficient care, and attention to a clean assembly routine is all it took.
Other Parts Used:
Roller Shaft Multi Rib Belt - 91-5/8 Inches Dryer Drum Felt Seal Light Bulb - 10W Front Glide Kit Drum Support Roller Kit
  • Steve from Windsor Locks, CT
  • Difficulty Level:
    Easy
  • Total Repair Time:
    1- 2 hours
  • Tools:
    Nutdriver, Pliers, Screw drivers, Socket set, Wrench set
1 of 3 people found this instruction helpful.
Was this instruction helpful to you?
Thank you for voting!
Dryer working but drum light not working, bulb ok.
Problem: Drum light not working, bulb ok. Removed 6 screws on panel behind timer, light, buzzer, switches. Lifted back of dryer top then moved dryer top forward and off of dryer. The switch was located above the door. Unhooked wiring plug and took out 2 screws holding in the switch. Installed new switch and repaced bulb. Reassembled as needed and tested light by opening door. Works great.
Other Parts Used:
Light Bulb - 10W Dryer Door Switch
  • Denton from Indianapolis, IN
  • Difficulty Level:
    Easy
  • Total Repair Time:
    15 - 30 mins
  • Tools:
    Screw drivers, Socket set
21 of 26 people found this instruction helpful.
Was this instruction helpful to you?
Thank you for voting!
Dryer was not heating and light bulb was broken
Without being a handy man, I saved money by replacing the heating element of our dryer at home. When drying clothing it was not heating, went to partselect and found the proper replacement. It was reeally easy to replace.
Other Parts Used:
Light Bulb - 10W Heating Element - 240V 5400W
  • Ivan from Miami, FL
  • Difficulty Level:
    Really Easy
  • Total Repair Time:
    30 - 60 mins
  • Tools:
    Screw drivers
2 of 8 people found this instruction helpful.
Was this instruction helpful to you?
Thank you for voting!
  • 1
  • 2
Questions and Answers

We're sorry, but our Q&A experts are temporarily unavailable.
Please check back later if you still haven't found the answer you need.

7 questions answered by our experts.
Sort by:
  • 1
Sorry, we couldn't find any existing answers that matched.Try using some different or simpler keywords, or submit your new question by using the "Ask a Question" button above!
Roger
November 5, 2017
Kenmore 70 series dryer. When door is opened the light doesn't come on and the dryer continues to spin until turned off manually at the timer switch. Now sure if these problems are related but they occurred at the same time. Thanks for your help.
For model number 11076712694
PartSelect logo
Hi Roger, Thank you for the question. I suggest replacing the Door Switch Assembly,PartSelect Number PS11741700.A door switch is a simple on/off mechanism that prohibits the dryer from operating when the door is open.Hope this helps!

11 people found this helpful.

Was this helpful?
Thank you for voting!
Robert
June 24, 2019
I replaced light bulb in my drier with night light then it burned right out.Do i need to replace with same type?
For model number 11064852400
PartSelect logo
Hello Robert. Thank you for the question. You will need to use a special heat resistant appliance bulb. PartSelect Number: PS11739347. Hope this helps!

4 people found this helpful.

Was this helpful?
Thank you for voting!
Valencia
April 11, 2018
What size light bulb to replace by ice maker on outside of door. How do I do it. ?
For model number ED22RF
PartSelect logo
Hello Valencia, Thank you for contacting us. I have researched the model you have provided and have found the part you’re looking for is PartSelect Number: PS11739347 for the 10W bulb. Please type the part number into the site for the how to video. Hope this helps!

3 people found this helpful.

Was this helpful?
Thank you for voting!
Mark
November 5, 2019
Dryer bulb burned out, opened door and saw a quick spark by the bulb and then the dryer failed. Could it be the bulb socket? I have removed it but can't locate the part number to replace it.
For model number GEW9250PW1
PartSelect logo
Hi Mark, thank you for your question. Here is that light bulb socket for you: PS1738111. It could be that part that is the issue. I hope that helps. Good luck with your repair.

2 people found this helpful.

Was this helpful?
Thank you for voting!
Philip
December 9, 2019
Location of lamp bulb
For model number WGD4900XLO
PartSelect logo
Hello Philip and thanks for writing. For your convenience, we have attached the link to your manual with repair instruction. We hope this helps. Good luck with your repair https://partselectcom.azureedge.net/assets/manuals/0344AE6987D63CCB0EA15497A8E79BC46072D73B.pdf

2 people found this helpful.

Was this helpful?
Thank you for voting!
David
July 5, 2023
Is this the bulb for the water dispenser?
For model number MSD2651HEW
PartSelect logo
Hi David, thank you for your inquiry. The part you are referring to is not compatible with your model. The compatible light bulb for the water dispenser of your model is part number PS11731356. We hope this information is useful!

1 person found this helpful.

Was this helpful?
Thank you for voting!
Related Parts:
Tracy
September 13, 2022
Gas Dryer. Can I run a Gas Dyer without a light bulb? Conflicting answers..
For model number YMEDX6STBW1
PartSelect logo
Hello Tracy, Thank you for the question. It is not safe to operate the dryer without the light bulb in the socket. We hope this helps!

Was this helpful?
Thank you for voting!
  • 1
You May Also Need ?
Model Cross Reference
This part works with the following models:
PartSelect Number: PS11739347
Manufacturer Part Number: WP22002263
Brand
Model Number
Description
Kenmore
10644102300
Refrigerator
Kenmore
10644103300
Refrigerator
Kenmore
10644109300
Refrigerator
Kenmore
10650212011
Refrigerator - REFRIGERATOR
Kenmore
10650343011
Refrigerator - REFRIGERATOR
Kenmore
10650522102
Refrigerator
Kenmore
10650524102
Refrigerator
Kenmore
10650532102
Refrigerator
Kenmore
10650534102
Refrigerator
Kenmore
10651042101
Refrigerator
Kenmore
10651044101
Refrigerator
Kenmore
10651049101
Refrigerator
Kenmore
10651062101
Refrigerator
Kenmore
10651064101
Refrigerator
Kenmore
10651069101
Refrigerator
Kenmore
10651103111
Refrigerator - REFRIGERATOR
Kenmore
10651252103
Refrigerator
Kenmore
10651252104
Refrigerator
Kenmore
10651254103
Refrigerator
Kenmore
10651254104
Refrigerator
Kenmore
10651259103
Refrigerator
Kenmore
10651259104
Refrigerator
Kenmore
10651262102
Refrigerator
Kenmore
10651262103
Refrigerator
Kenmore
10651262104
Refrigerator
Kenmore
10651262105
Refrigerator
Kenmore
10651264102
Refrigerator
Kenmore
10651264103
Refrigerator
Kenmore
10651264104
Refrigerator
Kenmore
10651264105
Refrigerator
Customer Service Representative

Get in touch, we're here to help!

Monday to Saturday
8am - 9pm EST

Contact Customer Service