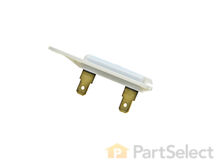
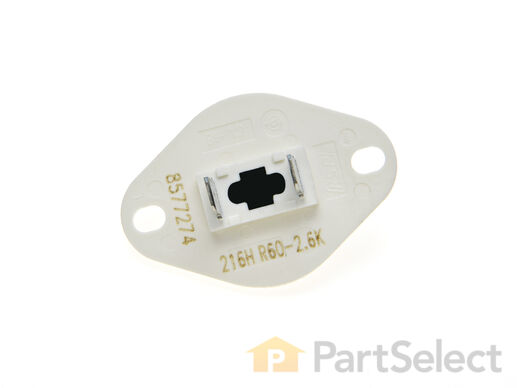
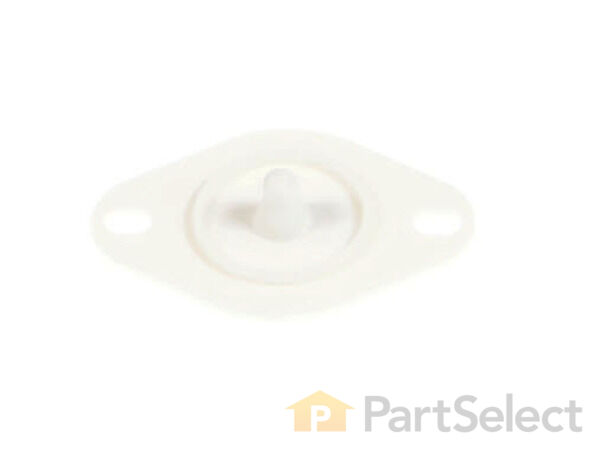
Part Location Diagram of WP8577274 Whirlpool Thermostat, Internal-Bias
See part 42 in the diagram
Replacing your Whirlpool Dryer Thermostat, Internal-Bias
( Grid squares measure 1x1 inch )
Customer Service Representative

Get in touch, we're here to help!

Monday to Saturday
8am - 9pm EST

customerservice@partselect.com

Thermostat, Internal-Bias WP8577274

★★★★★
★★★★★
31 Reviews

Rated by 30 customers 

Easy 

1- 2 hours 

Ratings submitted by customers like you who bought this part.

$ 47.70
  In Stock
Get FREE EconoShip on orders over $100! T&C apply

Get this part fast! Average delivery time for in-stock parts via standard shipping: 1.8 days.

Does this part fit my model?

Need help finding your model number?
PartSelect Number PS11746740
Manufacturer Part Number WP8577274
Manufactured by Whirlpool for Whirlpool, Kenmore, Maytag, KitchenAid
Product Description

Thermostat, Internal-Bias Specifications

The internal-bias thermistor (Thermistor, Dryer Thermister, Dryer Thermistor) prevents the dryer from overheating by monitoring and controlling the temperature of the inside of the dryer drum. It is located on the blower housing, next to the thermal fuse. If your thermistor is defective, drying time could be prolonged or you could get a fault code. You could also notice your dryer overheating. You can test the outlet thermistor on a multimeter, it should read 10Kohms (10,000 ohms) of resistance at room temperature. It can tolerate 10% fluctuation. If your reading indicates the part is defective, it will need to be replaced. This model is white plastic. It is sold individually.
How Buying OEM Parts Can Save You Time and Money

How Buying OEM Parts Can Save You Time and Money

Part Videos
Difficulty: Easy | Tools Required: Screw drivers,Socket set
Repair Tip: This part may look slightly different, but functions the same as original part.

Replacing your Whirlpool Dryer Thermostat, Internal-Bias

Replacing your Whirlpool Dryer Thermostat, Internal-Bias

How to Troubleshoot a Dryer That Doesn't Heat Properly

How to Troubleshoot a Dryer That Doesn't Heat Properly

Test If Your Electrical Part is Failing - Multimeter Tool

Test If Your Electrical Part is Failing - Multimeter Tool
Troubleshooting
This part fixes the following symptoms:
Too hot | Not Heating | Won’t Start | Touchpad does not respond
This part works with the following products:
Dryer, Washer Dryer Combo.
Part# WP8577274 replaces these:
AP6013514, 3390292, 3406294, 3976615, 772546, 8577274, WP8577274VP
Back to Top
Customer Reviews
Average Rating:
★★★★★
★★★★★
31 Reviews
4.5
Filter By Rating:
  • 5 Stars
    26
  • 4 Stars
    2
  • 3 Stars
    0
  • 2 Stars
    0
  • 1 Star
    3
Sort by:
  • 1
  • 2
  • 3
Sorry, we couldn't find any existing reviews that matched. Try using some different or simpler keywords.
  • 1
  • 2
  • 3
Customer Repair Stories
 Average Repair Rating: 3.0 / 5.0, 30 reviews. What's this?
Sort by:
  • 1
  • 2
  • 3
Sorry, we couldn't find any existing installation instruction that matched.
Dryer drum would not turn
Ordered $245 worth of parts for four possible fixes. None of the four fixes worked. Used an appliance repair person to do more troubleshooting. Fourteen days later and after spending an additional $380 ($625 total), a new control panel was installed. That solved the problem.
Other Parts Used:
Thermostat, Internal-Bias Motor Pulley - 60 Hz. Dryer Repair Kit Idler Pulley
  • Karla from YAKIMA, WA
  • Difficulty Level:
    Very Difficult
  • Total Repair Time:
    More than 2 hours
  • Tools:
    Nutdriver, Screw drivers
2 of 3 people found this instruction helpful.
Was this instruction helpful to you?
Thank you for voting!
Dryer won’t start
Drum belt broke. Found drive shaft belt guide broke. Replaced pulley wheel since I had it apart.
Other Parts Used:
Thermostat, Internal-Bias Light Bulb - 10W
  • Kyle from HANOVER, IL
  • Difficulty Level:
    Really Easy
  • Total Repair Time:
    30 - 60 mins
  • Tools:
    Nutdriver, Socket set
1 of 2 people found this instruction helpful.
Was this instruction helpful to you?
Thank you for voting!
Start button failed to keep dryer running; no heat
Dryer is still in pieces after two weeks, dependent upon my time and ability to work on the project. I usually dry my clothes on an outside line, anyway. I especially appreciate Steve's videos demonstrating step-by-step procedures for disassembly, part installation, and reassembly. Very thorough. I timed each presentation---five minutes for one, less than ten for the other. I watched the videos several times and took notes, so I would have the procedures in front of me while working on the unit at the other end of the house, I'm 77, forgetful. When I disassembled my unit, I noticed several rusted areas, so decided not to complete the project until I could get to the store for paint. As a primary care-giver for a severely dementiated 79-year Old Lady, I have to arrange for a relief to go shopping. That's why the machine is still in pieces. Got the paint, though, so back to work---eventually. When I disassembled the dryer, tucked away in the bottom was a very informative TECH SHEET, the discovery of which ticked me off that it wasn't provided with the owner's manual. At the bottom it says, "For Service Technicians' Use Only." In my house, I'm the "...Service Technician...," chief cook and bottle washer, launderer and litter box attendant.
Other Parts Used:
Thermostat, Internal-Bias Disposable Thermal Fuse - Two Terminal
  • William from APPLE VALLEY, CA
  • Difficulty Level:
    Easy
  • Total Repair Time:
    More than 2 hours
  • Tools:
    Nutdriver, Screw drivers
1 person found this instruction helpful.
Was this instruction helpful to you?
Thank you for voting!
Gas burner would heat for six or seven minutes, then shut down, and not cycle on again.
Unplugged electric power, removed lower front panel, removed fan unit cover. Was able to easily reach and test the disposable thermal fuse ok; m-coils ok but replaced; tested internal bias thermostat bad, replaced. Put fan unit cover on. Plugged dryer in to test and repair was successful. Did not install new igniter, flame sensor, or thermal cutoff fuse kit at this time but will keep for future if necessary.
Parts.Select online help made it easy for me to do this repair. I bought all possible parts $170 w. ship given the dryer age. Three day delivery Denver to Phila.
Before attempting to repair, called Kenmore service and. Was told one month before tech was available, unacceptable. Went to several appliance stores to buy new and found earliest available delivery would be 1 - 3 months! So went online to attempt repair. Found Parts Select which had numerous examples of exact problem and identified likely defective parts. So we avoided spending $1600 on a new dryer. The three installed parts were about $60! Highly recommend Parts Select.
Other Parts Used:
Thermostat, Internal-Bias Disposable Thermal Fuse - Two Terminal M Series New Style Coil Kit
  • Everett from PHILADELPHIA, PA
  • Difficulty Level:
    Really Easy
  • Total Repair Time:
    1- 2 hours
3 of 3 people found this instruction helpful.
Was this instruction helpful to you?
Thank you for voting!
No heat in the dryer
Went to Kenmore website, got parts diagram, watched You Tube videos on dryer repair for this model, ordered parts. When parts arrived (in 4 days, great job!), re-watched You Tube videos, installed parts, dryer works great. Took longer than industry standards because I had to suction out/vacuum a great deal of lint/hair. as I went along.
Other Parts Used:
Thermostat, Internal-Bias Dryer Heater Element Thermal Cut-Off with High Limit Thermostat
  • Raymond from CAMERON, NC
  • Difficulty Level:
    A Bit Difficult
  • Total Repair Time:
    More than 2 hours
  • Tools:
    Nutdriver, Pliers, Screw drivers, Socket set
5 of 5 people found this instruction helpful.
Was this instruction helpful to you?
Thank you for voting!
Shutting off and had to wait before could turn back on
Followed online video very easy and dryer works like new one....
  • Allen from KENNETT, MO
  • Difficulty Level:
    Really Easy
  • Total Repair Time:
    30 - 60 mins
  • Tools:
    Screw drivers, Socket set
1 person found this instruction helpful.
Was this instruction helpful to you?
Thank you for voting!
Dryer would run 1 min then stop running with some heat in drum
Videos are excellent to open and access internal parts. It turned out a rat was killed in the blower fan when we first encountered the problem. This prevented the blower from turning which interfered with motor function.

This required removing drum & belt, disconnecting motor clips, blower belt, and blower housing. The blower housing needed to be disassembled. Having a 5/16” & 1/8” ratcheting nut driver makes this process much easier. Don’t try this with a wrench.

After getting rid of the rat and decomposition, we sanitized the entire housing with soap & chlorine bleach.

Reassembly was uneventful and relatively easy. We ended up replacing 4 rollers, 2 belts (drum belt & blower belt), the thermistor which was damaged as a result of the blocked blower.
Other Parts Used:
Roller Support Tri-Ring Dryer Drum Support Roller Thermostat, Internal-Bias Drum Drive Belt Moisture Sensor
  • Bob from CHULA VISTA, CA
  • Difficulty Level:
    A Bit Difficult
  • Total Repair Time:
    30 - 60 mins
  • Tools:
    Nutdriver, Pliers, Screw drivers
7 of 15 people found this instruction helpful.
Was this instruction helpful to you?
Thank you for voting!
F-26 Fault message
Message indicated something amiss in the motor circuit. Followed Instructions in the on-board manual. Turned out to be the internal-bias thermostat, and the exhaust air thermistor both. Changed faulty parts, cleaned lint from the system and we are off and running again.
Thank You.
DW Pranger
  • DW from ALVIN, TX
  • Difficulty Level:
    Very Easy
  • Total Repair Time:
    30 - 60 mins
  • Tools:
    Nutdriver, Screw drivers
1 person found this instruction helpful.
Was this instruction helpful to you?
Thank you for voting!
Dryer won't start
Started by using the parts select troubleshooting guide. Didn't think that the drive belt could possibly be broken as the dryer wouldn't start. The non turning drum caused the "thermistor" to blow.

This repair looks intimidating but really is very easy.

Thanks Part Select!
Other Parts Used:
Thermostat, Internal-Bias Multi Rib Belt Door Catch Kit
  • Dan from VANCOUVER, WA
  • Difficulty Level:
    Easy
  • Total Repair Time:
    30 - 60 mins
  • Tools:
    Nutdriver
1 person found this instruction helpful.
Was this instruction helpful to you?
Thank you for voting!
Dryer won't ignite.
Took all the advise on the diagnose. Replaced all the parts. My dryers fuse was not at the back. It was located on the blower box.
Other Parts Used:
Thermostat, Internal-Bias Disposable Thermal Fuse - Two Terminal M Series New Style Coil Kit Igniter Kit
  • Poh Kuan from WICKLIFFE, OH
  • Difficulty Level:
    Easy
  • Total Repair Time:
    More than 2 hours
  • Tools:
    Screw drivers, Socket set
1 of 4 people found this instruction helpful.
Was this instruction helpful to you?
Thank you for voting!
  • 1
  • 2
  • 3
Questions and Answers

We're sorry, but our Q&A experts are temporarily unavailable.
Please check back later if you still haven't found the answer you need.

123 questions answered by our experts.
Sort by:
  • 1
  • 2
  • 3
Sorry, we couldn't find any existing answers that matched.Try using some different or simpler keywords, or submit your new question by using the "Ask a Question" button above!
Grace
November 25, 2017
Our dryer won't heat. We think it might be part 42 that is the issue, since every thing else is normal. What should the resistance be on the internal bias thermostat? We have 11.4 kilohms.
For model number MEDX500XW0
PartSelect logo
Hi Grace, Thank you for your inquiry. The reading for the internal bias thermostat should read zero. If it is not zero then you will have to replace the thermostat. I hope this helps. Thank you and have a great day!

31 people found this helpful.

Was this helpful?
Thank you for voting!
CARL
January 5, 2018
When i push start button on my dryer it does not start but it beeps and says "sensing" got a diagnosis and fix for this?
For model number WED6400SB0
PartSelect logo
Hello Carl, Thank you for your inquiry. We would recommend checking the following parts to fix your issue: thermal cut out kit, internal bias thermostat, heating element, and main control board. You can test the parts with a multimeter. If you are unfamiliar with how a multimeter functions, there are YouTube videos available to assist you. Hope this helps!

25 people found this helpful.

Was this helpful?
Thank you for voting!
John
October 2, 2017
Have replaced thermal fuse-thermostat- and thermal cutoff.Checked vent lines.Moving ton of air.Does one load-clothes come out extremely hot and thermal fuse is out again.Any ideas?Thanks
For model number WED8300sw1
PartSelect logo
Hi John, Thank you for the question, I recommend replacing the Internal-Bias Thermostat,PartSelect Number PS11746740. This part controls the temperature of the inside of the dryer drum and prevents the dryer from overheating. Hope this helps!

24 people found this helpful.

Was this helpful?
Thank you for voting!
Shaun
September 29, 2017
My dryer has no heat, I have replaced the heating element and the thermal fuse, what else can I check or replace to fix the no heat problem?Everything else on the dryer works fine.
For model number WED7300XW0
PartSelect logo
Hi Shaun, Thank you for the question, I would recommend replacing the Internal-Bias Thermostat, PartSelect Number PS11746740.This part controls the temperature of the inside of the dryer drum and prevents the dryer from overheating.When defective you may not have heat inside the drum. Hope this helps!

13 people found this helpful.

Was this helpful?
Thank you for voting!
Todd
December 31, 2017
My dryer has no heat at all. What would you replace first? Heating element or thermal fuse...
For model number WDE9500TW3
PartSelect logo
Hello Todd, Thank you for your inquiry. I would try replacing both the thermal fuse and high limit thermostat first. Hope this helps!

8 people found this helpful.

Was this helpful?
Thank you for voting!
Ann-Marie
November 11, 2017
When your dryer won't start, how do you test to determine which part you need?
For model number MED6400TBO
PartSelect logo
Hi Ann-Marie, Thank you for your inquiry. To verify what part is causing the issue, you will need to use a multimeter to check the continuity of each part. If you need help using one, there are videos on YouTube that you may reference. I hope this helps. Thank you and have a great day!

7 people found this helpful.

Was this helpful?
Thank you for voting!
JOHN
August 1, 2018
What should my ohm meter read when checking this part
For model number CED9050AW0
PartSelect logo
Hello John, thank you for your question. The bias thermostat should read around 10,000 ohms at room temperature. Good luck with your repair!

6 people found this helpful.

Was this helpful?
Thank you for voting!
Rick
December 6, 2017
I have a Maytag dryer model mgdx600xw0, i have no heat. I replaced the igniter assembly and sensor pt# wp338906. I still have no heat. Can you help me?
For model number MGDX600XW0
PartSelect logo
Hi Rick, Thank you for the question.Sounds like the 'M' Series New Style Coil Kit, PartSelect Number PS334310 needs to be replaced.When the igniter reaches a high enough temperature, these coils work together to let the gas enter the dryer. The coils open the gas valve; if the valve does not open the heating element will not ignite. Hope this helps!

5 people found this helpful.

Was this helpful?
Thank you for voting!
Related Parts:
Joan
April 18, 2018
Timing is off will dry for 10 min then jump to 48 min does not turn off
For model number Wed6600vwd
PartSelect logo
Hi Joan, Thank you for the question. This sounds like an issue with the control board, PartSelect Number: PS11748076. The timer is built into the board so the board will need to be replaced. Hope this helps!

4 people found this helpful.

Was this helpful?
Thank you for voting!
Art
August 16, 2017
Hello, with the timer set on towels the unit has started to add time to this default setting. Other settings the timer works correctly. Thank you
For model number WED7600XW0
PartSelect logo
Hi Art, Thank you for your inquiry. That is a fairly tricky issue unfortunately. I would suggest testing your control board, this part, and your sensor as well. It could be that any one of these parts is causing that issue. I have listed those parts in two links below for you. If you find that they are all working fine, you might have to contact a repair technician to come and service your appliance. Good luck with your repair.

3 people found this helpful.

Was this helpful?
Thank you for voting!
Related Parts:
  • 1
  • 2
  • 3
You May Also Need ?
Model Cross Reference
This part works with the following models:
PartSelect Number: PS11746740
Manufacturer Part Number: WP8577274
Brand
Model Number
Description
Kenmore
11060052990
Dryer
Kenmore
11060052991
Dryer
Kenmore
11060056990
Dryer
Kenmore
11060056991
Dryer
Kenmore
1106007299
Dryer - Kenmore Dryer Model 110.6007299 (1106007299, 110 6007299) Parts
Kenmore
11060072990
Dryer
Kenmore
11060072991
Dryer
Kenmore
11060092990
Dryer
Kenmore
11060092991
Dryer
Kenmore
11060094990
Dryer
Kenmore
11060094991
Dryer
Kenmore
11060096990
Dryer
Kenmore
11060096991
Dryer
Kenmore
11060097990
Dryer
Kenmore
11060372710
Dryer - Dryer
Kenmore
11060882990
Dryer
Kenmore
11060884990
Dryer
Kenmore
11060887990
Dryer
Kenmore
1106093299
Dryer - Kenmore Dryer Model 110.6093299 (1106093299, 110 6093299) Parts
Kenmore
11060932990
Dryer
Kenmore
1106093699
Dryer - Kenmore Dryer Model 110.6093699 (1106093699, 110 6093699) Parts
Kenmore
11060936990
Dryer
Kenmore
1106094299
Dryer - Kenmore Dryer Model 110.6094299 (1106094299, 110 6094299) Parts
Kenmore
11060942990
Dryer - Kenmore Dryer
Kenmore
1106095299
Dryer - Kenmore Dryer Model 110.6095299 (1106095299, 110 6095299) Parts
Kenmore
11060952990
Dryer - Dryer
Kenmore
11060954990
Dryer
Kenmore
1106095699
Dryer - Kenmore Dryer Model 110.6095699 (1106095699, 110 6095699) Parts
Kenmore
11060956990
Dryer
Kenmore
1106095799
Dryer - Kenmore Dryer Model 110.6095799 (1106095799, 110 6095799) Parts
Customer Service Representative

Get in touch, we're here to help!

Monday to Saturday
8am - 9pm EST

Contact Customer Service