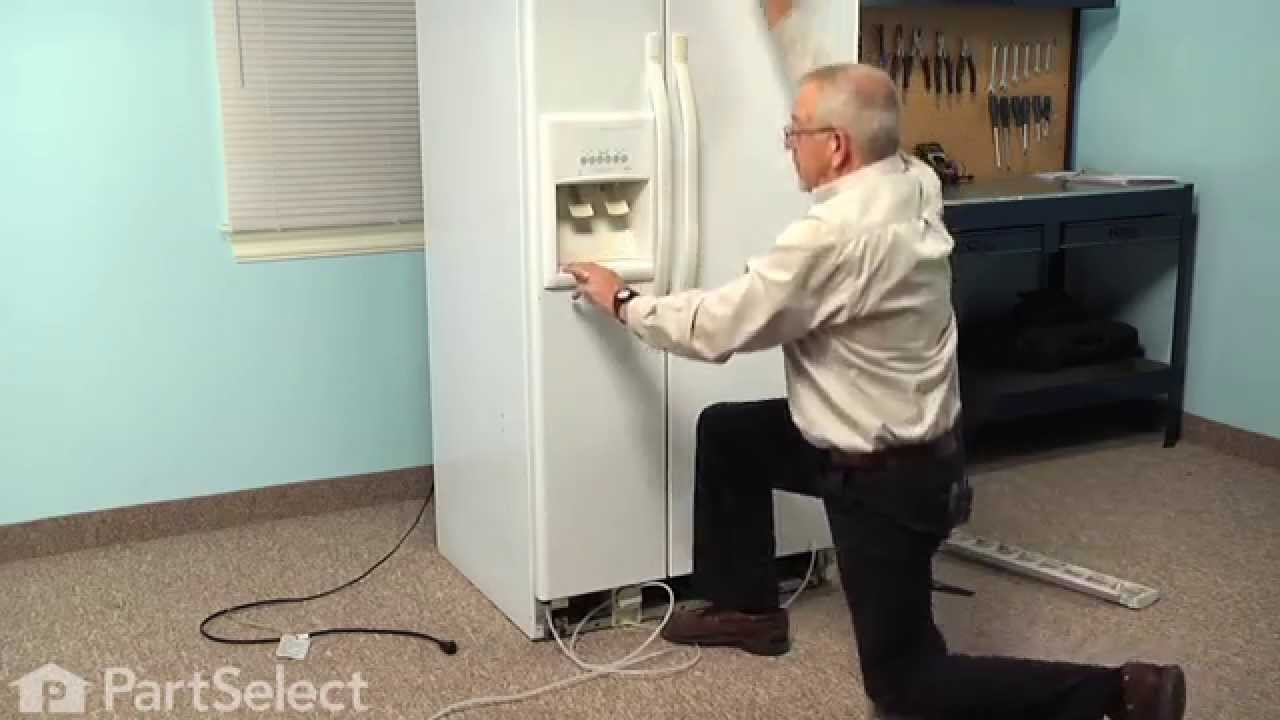
This kit is intended for use with refrigerators that have a water dispenser in the door.
How Buying OEM Parts Can Save You Time and Money
Troubleshooting
This part fixes the following symptoms:
Leaking | Not dispensing water
This part works with the following products:
Refrigerator.
This part works with the following products:
Whirlpool, Kenmore, KitchenAid, Roper.
Part# WP4388152 replaces these:
AP6009324, 1124717, 2150327, 2150328, 2150329, 2155018, 2155019, 2155020, 2155037, 2155056, 2155057, 2157744, 2157746, 2160760, 2160761, 2160762, 2169019, 2180225, 2182193, 4388152
...
Show more, 987050 Show less
Customer Reviews
Average Rating:
★★★★★
★★★★★
7 Reviews
4.7
Filter By Rating:
5 Stars
5
4 Stars
2
3 Stars
0
2 Stars
0
1 Star
0
Sort by:
< Prev
1
Next >
Search filter:
Clear Filter
Your search term must have 3 or more characters.
Keep searches simple. Use keywords, e.g. "leaking", "pump", "broken" or "fit".
Sorry, we couldn't find any existing reviews that matched. Try using some different or simpler keywords.
★★★★★
★★★★★
Katherine M E - November 1, 2022
Verified Purchase
Water nozzle replacement
Watched the repair on YouTube, was very easy to follow.
★★★★★
★★★★★
James K - July 24, 2020
Verified Purchase
Not hard at all
No more wet floor
★★★★★
★★★★★
Charles W - June 7, 2019
Verified Purchase
SHIPPING CO OR RECEIVING PRIVATE POSTAL SERVICE MESSED UP
I got the package a week late. NOT A PROBLEM ... but I have not had time to do this project.
temporary rating because it will be a while before repairs will be made.
★★★★★
★★★★★
Delores K H - February 23, 2019
Verified Purchase
Works as expected.
The part was received in good condition. We used a Flamingo Appliance repairman to complete the installation.
★★★★★
★★★★★
Tim H - October 11, 2018
Verified Purchase
Exact fit and easy install
The part was exactly as described and was a perfect fit for replacement. The video demonstration was also very helpful.
★★★★★
★★★★★
DEBRA B - September 26, 2018
Verified Purchase
Great part
The part arrived early as usual. Glad to have the water dispenser working again.
★★★★★
★★★★★
Delynn S - July 8, 2018
Verified Purchase
Quick easy job
Quick and easy to replace. Didn't need to shut off the water supply as the water is pumped on demand when activating the dispenser, just lock out the dispenser on the door panel and you're good to go. I only needed the black tubing portion with the nozzle but had to purchase the entire line otherwise it could have been a five star purchase.
< Prev
1
Next >
Customer Repair Stories
Average Repair Rating: 3.4 / 5.0, 20 reviews.
What's this?
Sort by:
< Prev
1
2
Next >
Search filter:
Clear Filter
Your search term must have 3 or more characters.
Keep searches simple. Use keywords, e.g. "leaking", "pump", "broken" or "fit".
Sorry, we couldn't find any existing installation instruction that matched.
Leak in tube
Follow simple instructions found on youtube
Steven from KEARNEY, NE
Difficulty Level:
Really Easy
Total Repair Time:
30 - 60 mins
Tools:
Screw drivers, Socket set
1 of 2 peoplefound this instruction helpful.
Was this instruction helpful to you?
Thank you for voting!
Broken water nozzle
We pushed the water return hose up from the bottom of the freezer door then we cut the water hose off then we taped the new water hose to the old one using electrical tape then we pulled and pushed at the same time and ran it back down through the door, be careful when you get to the bottom of the door it might stick a little going throug
... Read moreh the door , on my first try the tape came off without the new hose coming through. Just run the old one back up through the door and re tape it and try again. The connection at the bottom is just a pull out and push in connection and it won't leak after you push it in.
Read less
Becky from Akron, OH
Difficulty Level:
Really Easy
Total Repair Time:
15 - 30 mins
2 of 2 peoplefound this instruction helpful.
Was this instruction helpful to you?
Thank you for voting!
Nozzle on water dispenser broke off
Removed screw that held nozzle on. Pulled old line out far enough to cut off broken nozzle. Attached new line with threaded bolt and clear packing tape. Pulled old line out bottom of door until new line came thru. Removed tape and bolt. Attached new line to water supply. Attached new nozzle with screw. Checked for water leaks. Job
... Read more complete!
Read less
Dan from DERBY, KS
Difficulty Level:
Very Easy
Total Repair Time:
30 - 60 mins
Tools:
Screw drivers
2 of 3 peoplefound this instruction helpful.
Was this instruction helpful to you?
Thank you for voting!
Water Desper nozzel, control bracket ice guide missing and door trim off
Popped fromt pannel off from bottom side removed 2 screws from control bracket and took switches etc. off old bracket. removed broken water tube and cut top off. Secured black tubing together and pulled down through door fastened into exixting fitting repolaced one screw. placed switches onto new control bracket and okaced back with 2 scr
... Read moreews. Snappec ice guide in place then replaced cover into notches in top and snapped into place. incerted 2 new door handle trim clips into trim and slid into place,,,,finished
part arrived within 24 hours. 1. remove plastic front of freezer door water and ice dispenser by looking at bottom edge of plastic for two slots within which to place a stiff scraper blade. very difficult to pop loose and very fragile plastic so take care not to break it. it just pops off two spots on the bottom side and hangs from
... Read morethe top no screws or anything. 2. remove the two screws holding the water dispenser spout in place. oh yeah don't forget to turn the water off. 3. this is a long plastic water tube that runs from the dispenser thru a plastic tube channel set in the solid foam core of the door thru the bottom hinge and connects to the water inlet junction. a. this replacement must be pulled from the dispenser area thru the door and out the bottom but it will not fit without cutting off the end of the spout. the hole in the hinge that it passes thru at the bottom of the door is to tight to allow anything other than the thickness of the tubing. b. pull the spout end of the tubing upward after disconnecting at the bottom in front behind the air grill. if it moves freely you are in luck - if it does not move freely then it is taped in place on the back of the dispenser area and now that whole assembly has to be unscrewed from the front of the freezer door in order to remove the tape so that the tubing can be pulled thru. 4. once the tubing pulls easily as short distance in either direction it is time to attach the new tubing to the old tubing and pull it out the bottom of the door. i tried to use tape but it pulled off when i got to the door hinge on the bottom and it would not fit thru the hinge. a. on my model even one layer of tape would not fit thru the hinge. so i put some bricks under the freezer door to hold it up and removed the bottom hinge off of the tubing that was disconnected only a short distance away. 5. use tape or place a screw with the head removed into both the old tubing and the new tubing so it can be pulled from the bottom moving the new tubing into place. mine broke off in the middle of this process and i had to remove the freezer door. take it completely apart to expose the conduit the tubing slides thru, then run an electrical fish tape thru the conduit and drag the new tubing thru, not a fun process but doable - just takes a bunch of extra time. 6. once the tubing was out the bottom i could then simply thread it thru the hinge easily and reassemble everything.
Read less
thomas from corona, CA
Difficulty Level:
A Bit Difficult
Total Repair Time:
More than 2 hours
Tools:
Nutdriver, Screw drivers
15 of 18 peoplefound this instruction helpful.
Was this instruction helpful to you?
Thank you for voting!
the nozzle was broken
1. PUsh the Lock button so the water will not run. 2.Remove the screw holding the nozzle. 3. Remove the Grill 4. Disconnect the black water tube. Pull the female part of the union off the old tube and hold it for the new tube. 5. PUll it the tube out from the nozzle end. 6. Snake the new tube into the hole and sho
... Read moreve it through until it comes out the door hinge port at the bottom of the door. 7. Continue pushing and pulling the tube until the nozzle is in position. 8.Test fit the new tube and cut a short piece off to fit properly. 9. Slide the female part of the union onto the new tube. Insert it onto the union and tighten. 10. Insert the screw that holds the nozzle in place and tighten. 11. Push the on unlock button and fill a glass with water. 12. Check for leaks. If no leaks reinstall the grill. Job done.
Read less
Alvin from Sugar Land, TX
Difficulty Level:
Really Easy
Total Repair Time:
Less than 15 mins
Tools:
Screw drivers
4 of 4 peoplefound this instruction helpful.
Was this instruction helpful to you?
Thank you for voting!
Refrigerator water nozzle broke
The nozzle of the water dispenser broke. I ordered the part which arrived the next day. I did not use the white line, only the black. I turned the water off, then I removed the screw under the broken nozzle and cut off it off from the line. I took a new screw and cut off the top with pliers, then twisted half of a screw in the old li
... Read morene and inserted the other half in the new line and pulled the line from the bottom corner of the refrigerator and connected it to the white line under the grid. Screwed the new nozzle back to the lever, replaced the grid and turned water on.
Read less
Sandra from RESTON, VA
Difficulty Level:
Really Easy
Total Repair Time:
Less than 15 mins
Tools:
Screw drivers
5 of 5 peoplefound this instruction helpful.
Was this instruction helpful to you?
Thank you for voting!
the nozzle on the water spigot broke
we read on this site how to run the tube down thru the door but we had some problems. we used tape to put together the old and new hose to snake it down and the old hose pulled apart from the new and was stuck in the hole at the bottom of the door. my husband propped up the door and took the bottom hinge off to get to the hole where the t
... Read moreape was stuck and I was able to get a hold of it to finish pulling it through. I think we had to thick of tape wrapped around the two pieces.
Read less
Leanna from Tracy, CA
Difficulty Level:
A Bit Difficult
Total Repair Time:
15 - 30 mins
Tools:
Screw drivers, Wrench (Adjustable)
5 of 9 peoplefound this instruction helpful.
Was this instruction helpful to you?
Thank you for voting!
Nozzel snapped off while changing light bulb
Removed old nozzle and threaded in new one as many others have described. The most difficult part was removing the entire plastic enclosure that the dispenser is housed in, as the supply line was securely taped to the back side. Once the tape was removed, the job went very quickly. The tape may be unique to Whirlpool as no one else has
... Read more mentioned it.
Read less
James from Arundel, ME
Difficulty Level:
A Bit Difficult
Total Repair Time:
30 - 60 mins
Tools:
Nutdriver, Wrench set
1 of 4 peoplefound this instruction helpful.
Was this instruction helpful to you?
Thank you for voting!
nozzle on water dispenser broke off.
First, turn of the water supply. Then remove the snap on grill from the bottom front of the refrigerator. Disconnect the black hose from the white hose and drain the hoses into a suitable recepticle. Then remove the 1/4" screw that holds the nozzle in place. Cut the hose off just behind the nozzle bracket and tape the end of the new h
... Read moreose to the now exposed end of the existing hose. From the bottom of the door you can now gently pull out the old hose while pulling in the new one. Re-attach the new hose to the existing white hose and replace the 1/4' screw to the new nozzle bracket. I reccoment using 1" wide tape and only going around the tubes once. Too much tape and you won't be able to feed it through the small hole at the bottom of the door. Have someone feed the hose from the top as you gently pull from the bottom.
Read less
Tom from Roseville, CA
Difficulty Level:
Easy
Total Repair Time:
15 - 30 mins
Tools:
Pliers, Screw drivers
16 of 17 peoplefound this instruction helpful.
Was this instruction helpful to you?
Thank you for voting!
< Prev
1
2
Next >
Questions and Answers
We're sorry, but our Q&A experts are temporarily unavailable.
Please check back later if you still haven't found the answer you need.
10 questions answered by our experts.
Sort by:
< Prev
1
Next >
Search filter:
Clear Filter
Your search term must have 3 or more characters.
Keep searches simple. Use keywords, e.g. "leaking", "pump", "broken" or "fit".
Sorry, we couldn't find any existing answers that matched.Try using some different or simpler keywords, or submit your new question by using the "Ask a Question" button above!
Craig
January 23, 2018
The nozzle on the water dispenser broke on my fridge. I found this part Kenmore nozzle and tube wp4388152 which seems to be the right thing. Can you get just the nozzle separately or does it only come as the full kit?
For model number 59589990
Hello Craig, Thank you for your inquiry. It only comes as the full kit. Hope this helps!
20 people found this helpful.
Was this helpful?
Thank you for voting!
Clarence
March 5, 2018
Does this unit have a water filter. If so where is it?
For model number ED22TQXFW00
Hello Clarence, thank you for your question. Per your model information this unit does not take a water filter. I hope this helps!
3 people found this helpful.
Was this helpful?
Thank you for voting!
Carey
September 16, 2017
Trying to replace water line in freezer door and cant pull it either way. I have taken the bottom hinge off as one video showed and the line free at spout end but it seems stuck
For model number KSRS27QAWH05
Hello Carey, thank you for contacting us. We have a how to video that can help with the install. Just follow the link below, hope this helps!
https://www.youtube.com/watch?v=lnEV4ZHC_W4&t=
3 people found this helpful.
Was this helpful?
Thank you for voting!
Irving
May 9, 2019
The water dispenser nozzle broke off. Can you supply a new nozzle?
For model number KSRS25IHBT00
Hi Irving,
Thank you for your question. The nozzle and tube kit you have referenced in your question to us would be the correct part for your refrigerator. I hope this helps. Thank you and have a great day!
2 people found this helpful.
Was this helpful?
Thank you for voting!
Frank
June 26, 2019
We have a 1992 Roper fridge and the water dispenser doesn't shut off all of the time. How hard is this to fix and how much are the repair parts?
For model number RS25AWXZW00
Hello Frank, thank you for inquiring. For this symptom you will want to consider either the Nozzle and Tube Kit part PS11742481, the Dual Outlet Valve Kit part PS358630, or the Ice Maker Water Fill Tube Kit part PS11739222 for your model. Most of our customers perform these repairs themselves. There is a link to installation videos for each one of those parts located under the photos in the part description, and the prices are listed to the left of the 'Add to Cart' button. We hope this helps.
2 people found this helpful.
Was this helpful?
Thank you for voting!
Frank
June 28, 2019
How hard is it to just shut off the water side of the dispenser?
For model number RS25AWXZW00
Hello Frank, Thank you for the question. Only way to turn off the water for the dispenser is to turn off the water supply to the appliance. Hope this helps!
1 person found this helpful.
Was this helpful?
Thank you for voting!
Dan
July 19, 2021
My nozzle broke. Can I just replace the nozzle or do I have to replace the whole tube assembly?
For model number 10659562990
Hello Dan, Thank you for the question. The Nozzle is only sold as part of the Tube Kit, We hope this helps!
1 person found this helpful.
Was this helpful?
Thank you for voting!
Eddie
October 28, 2017
Front water dispenser continually drips water, how do i fix?
For model number ed25pex
Hi Eddie,
Thank you for your inquiry. If the dispenser is dripping water then the water line may be leaking and you will need to check it. I hope this helps. Thank you and have a great day!
Was this helpful?
Thank you for voting!
Stan
September 16, 2017
Does this have a water filter and if it does where is it. It is not in the front grill or behind it.
For model number 10657562790
Hello Stan. Thank you for contacting us. The manufacturer does not have a water filter listed for this model. Good luck with the repair!
Was this helpful?
Thank you for voting!
Cindy
October 14, 2022
Does the nozzle and black tub come separate from the kit? Or just the white plastic nozzle on the end?
For model number 10650593003
Hi Cindy,
Thank you for your question. The nozzle and tubes are sold together. If you need help placing an order for the kit, customer service is open 7 days a week and anyone will be happy to assist you. Please feel free to give us a call. We look forward to hearing from you!