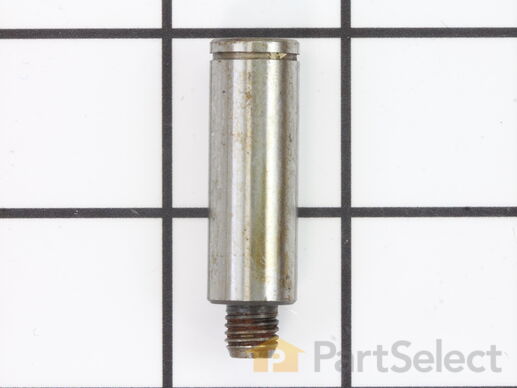
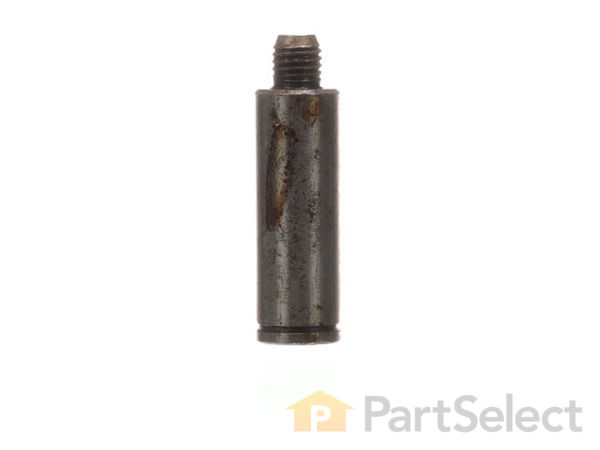
Part Location Diagram of WP6-3129480 Whirlpool Roller Shaft
See part 6 in the diagram
Replacing your Maytag Dryer Roller Shaft
( Grid squares measure 1x1 inch )
Customer Service Representative

Get in touch, we're here to help!

Monday to Saturday
8am - 9pm EST

customerservice@partselect.com

Roller Shaft WP6-3129480

★★★★★
★★★★★
3 Reviews

Rated by 93 customers 

Easy 

1- 2 hours 

Ratings submitted by customers like you who bought this part.

$ 9.80
  In Stock
Get FREE EconoShip on orders over $100! T&C apply

Get this part fast! Average delivery time for in-stock parts via standard shipping: 1.8 days.

Does this part fit my model?

Need help finding your model number?
PartSelect Number PS11743031
Manufacturer Part Number WP6-3129480
Manufactured by Whirlpool for Maytag, International, Jenn-Air, Crosley
Product Description

Roller Shaft Specifications

This roller shaft is also known as a support roller shaft or a drum roller axle, and is a part for your dryer. The function of this piece is to act as the axle for the drum roller; it provides a place for the roller to spin. The tools required for this repair are a stubby Phillips screwdriver, a 5/16 nut driver, a pair of snap ring pliers, and a 9/16 wrench. The first step before replacing this part should be to disconnect your dryer from the power source.
How Buying OEM Parts Can Save You Time and Money

How Buying OEM Parts Can Save You Time and Money

Part Videos

Replacing your Maytag Dryer Roller Shaft

Replacing your Maytag Dryer Roller Shaft
Troubleshooting
This part fixes the following symptoms:
Noisy
This part works with the following products:
Dryer, Washer Dryer Combo.
Part# WP6-3129480 replaces these:
AP6009858, 3-12948, 312948, 6-3129480, W10912638, WP6-3129480VP, Y312948
Back to Top
Customer Reviews
Average Rating:
★★★★★
★★★★★
3 Reviews
4.0
Filter By Rating:
  • 5 Stars
    2
  • 4 Stars
    0
  • 3 Stars
    0
  • 2 Stars
    1
  • 1 Star
    0
Sort by:
  • 1
Sorry, we couldn't find any existing reviews that matched. Try using some different or simpler keywords.
  • 1
Customer Repair Stories
 Average Repair Rating: 2.9 / 5.0, 93 reviews. What's this?
Sort by:
  • 1
  • 2
  • 3
Sorry, we couldn't find any existing installation instruction that matched.
Dryer started to sound like someone was beating a dog in the laundry room.
The dryer model was on a sticker inside the door which had long ago rubbed off. The most difficult part was figuring our how to dismantle the dryer. I finally looked up the matching washer by model number watched a youtube video and the dismantle was the same....take off the door, remove front cover then remove screws that held the hook brackets that held the top down. After we figured that out the rest was pretty easy. The main issue was the Idler Pulley Wheel and Bearing. We decided to replace the rest of the parts because we already had the thing all apart. It is amazing all the lint that gets into the dryer cabinet and passed the lint filter. Dryer works like new again. I love this set and will keep repairing as long as we can get parts.
Other Parts Used:
Idler Pulley Wheel and Bearing Roller Shaft Multi Rib Belt - 91-5/8 Inches Dryer Drum Felt Seal Front Glide Kit Drum Support Roller Kit
  • Janel from BOWDLE, SD
  • Difficulty Level:
    A Bit Difficult
  • Total Repair Time:
    1- 2 hours
  • Tools:
    Nutdriver, Screw drivers, Socket set, Wrench set
1 person found this instruction helpful.
Was this instruction helpful to you?
Thank you for voting!
Very Loud Squeaking / Clothing having rips
The support rollers were fried, literally. I'm honestly surprised they held on. Let's just say that the "roller" part wasn't even attached to the support wheel... That bad. Because there wasn't much support there is a small tear in the metal on the back drum. The felt seal for the drum had basically been worn down to pieces. So I order two drum support rollers, two roller shafts, a new drum felt seal, and a new rib belt.

After the repair, no more squeaking, literally a huge difference, and because of there's plenty of support now for the drum, there isn't any clothes being torn. If it weren't for the videos and the parts, we would of spent hundreds of dollars on a new dryer. Instead we spent just over $100 and now our dryer is quiet and operating better than when we got it.
Other Parts Used:
Roller Shaft Multi Rib Belt - 91-5/8 Inches Dryer Drum Felt Seal Drum Support Roller Kit
  • Landon from SPANISH FORK, UT
  • Difficulty Level:
    Really Easy
  • Total Repair Time:
    1- 2 hours
  • Tools:
    Pliers, Screw drivers, Socket set
3 of 3 people found this instruction helpful.
Was this instruction helpful to you?
Thank you for voting!
Bearing and shaft noise.
Followed the directions of the video and all went smooth. Cleaning the lint and parts was the more time consuming than the actual repair. 30 minutes for the repair and an hour for the clean. All and all very easy.
Other Parts Used:
Idler Pulley Wheel and Bearing Roller Shaft Idler Shaft Retaining Ring Idler Arm Screw Sleeve
  • Franklin from YPSILANTI, MI
  • Difficulty Level:
    Really Easy
  • Total Repair Time:
    1- 2 hours
  • Tools:
    Nutdriver, Pliers, Screw drivers
1 person found this instruction helpful.
Was this instruction helpful to you?
Thank you for voting!
Dryer emitted a squeaky noise every time it started
We inherited this dryer three years ago upon purchasing our current house. At that time I found this website to purchase and install a couple of the baffles that were missing. This time, I checked the troubleshooting for my current problem and ordered all of the parts I felt I needed to resolve the problem. Once I received the parts, I followed the great how-to videos by Steve to disassemble the front of the dryer and remove the drum. I could not get to the repairs right away since the interior of the dryer was quite dirty and I took a lot of time to clean it out. Once I got to removing and replacing the drum rollers, idler pulley, rear drum felt shaft, and drum belt, everything went smoothly and was just as easy as Steve described in the videos. If I didn't have such a dirty machine interior, removing the old parts and installing the new parts would have taken less than an hour. I had to hold off on installing the front glide kit and front drum felt seal since I forgot to order two of each (I'll install these at a later date. I proceeded to putting everything back together and testing the dryer. The dryer now runs quietly and works great.
Other Parts Used:
Idler Pulley Shaft Washer Retaining Ring Idler Pulley Wheel and Bearing Roller Shaft Idler Shaft Retaining Ring Multi Rib Belt - 91-5/8 Inches Dryer Drum Felt Seal Front Glide Kit Drum Support Roller Kit
  • Robert W from OTSEGO, MI
  • Difficulty Level:
    Easy
  • Total Repair Time:
    More than 2 hours
  • Tools:
    Nutdriver, Screw drivers, Socket set, Wrench (Adjustable)
2 of 2 people found this instruction helpful.
Was this instruction helpful to you?
Thank you for voting!
Blower Wheel was damaged
I followed all of the instructional videos and things went very smoothly. Easy to follow. I replaced several other parts to avoid having to do other repairs later. I hope this should get us another 20+ years from this dryer.
Other Parts Used:
Tumbler and Motor Belt Retaining Ring Roller Shaft Idler Pulley Wheel Idler Shaft Retaining Ring Blower Wheel with Clamp Front Glide Kit Drum Support Roller Kit
  • Fred from COLUMBIA FLS, MT
  • Difficulty Level:
    Easy
  • Total Repair Time:
    1- 2 hours
  • Tools:
    Nutdriver, Pliers, Screw drivers, Socket set, Wrench (Adjustable)
1 person found this instruction helpful.
Was this instruction helpful to you?
Thank you for voting!
Dryer would not start
This website is awesome. After imputing my dryer model I was able to select from the list if symptoms my issue...Dryer will not start. From there was percentage of issues that would cause my issue. After determining it was the motor (after 25 years who would have thought that!!!). In this process I discovered other non related issues that i should attend to. So I basically rebuilt the dryer and it worked right away. I am retired military and in the tax preparation/representation business now, so a lot of this was new to me. The detailed instruction and especially the videos provided foolproof methods to complete each of the repairs. It was a little time consuming but very easy to complete. I did gain some new tools and diagnostic equipment that will come in handy in the future. Now I am going to tackle my daughters dishwasher. Thank you Parts Select and Steve (on the videos). John Beazle
Other Parts Used:
Roller Shaft Motor Pulley Front or Rear Drum Felt Seal Drum Roller Shaft Washer Drive Motor - 60Hz 115V Front Glide Kit Drum Support Roller Kit
  • John from COHUTTA, GA
  • Difficulty Level:
    Easy
  • Total Repair Time:
    More than 2 hours
  • Tools:
    Nutdriver, Pliers, Screw drivers, Socket set, Wrench set
6 of 12 people found this instruction helpful.
Was this instruction helpful to you?
Thank you for voting!
Loud squealing noise
Disassembled dryer and replaced drum support roller and shaft. That took care of the noise but I still replaced the belt and idler pulley while I had it apart.
Other Parts Used:
Idler Pulley Wheel and Bearing Roller Shaft Multi Rib Belt - 91-5/8 Inches Drum Support Roller Kit
  • Doyce from PENSACOLA, FL
  • Difficulty Level:
    Really Easy
  • Total Repair Time:
    30 - 60 mins
  • Tools:
    Nutdriver, Screw drivers, Socket set
5 of 9 people found this instruction helpful.
Was this instruction helpful to you?
Thank you for voting!
Squeeking drum
Went smoothly. Took the opportunity to vacuum out entire cabinet. Also removed tumbler vanes inside dryer as coins had made their way into them. The only other suggestion I have is that I didn't notice cabinet screws were different lengths till I started reassembly. Might be smart to label and separate them
Other Parts Used:
Idler Pulley Wheel and Bearing Roller Shaft Drum Support Roller Kit
  • KARL from NAMPA, ID
  • Difficulty Level:
    Really Easy
  • Total Repair Time:
    30 - 60 mins
  • Tools:
    Nutdriver, Pliers, Screw drivers, Wrench set
5 of 9 people found this instruction helpful.
Was this instruction helpful to you?
Thank you for voting!
Noisy & Drum stop working
Replaced damaged parts and recommended parts normally causing the problem. Dryer is working again like new. I expended $112 rather than $600 for a new equipment. Good deal!
Other Parts Used:
Retaining Ring Idler Pulley Wheel and Bearing Roller Shaft Idler Shaft Retaining Ring Multi Rib Belt - 91-5/8 Inches Dryer Drum Felt Seal Drum Support Roller Kit
  • Tulio from ASHLAND, MA
  • Difficulty Level:
    Really Easy
  • Total Repair Time:
    30 - 60 mins
  • Tools:
    Nutdriver, Pliers, Screw drivers, Socket set, Wrench set
5 of 10 people found this instruction helpful.
Was this instruction helpful to you?
Thank you for voting!
noisy
replaced
Other Parts Used:
Roller Shaft Drum Roller Shaft Washer Front Glide Kit Drum Support Roller Kit
  • Ray from MUKWONAGO, WI
  • Difficulty Level:
    A Bit Difficult
  • Total Repair Time:
    More than 2 hours
  • Tools:
    Nutdriver, Socket set
2 of 3 people found this instruction helpful.
Was this instruction helpful to you?
Thank you for voting!
  • 1
  • 2
  • 3
Questions and Answers

We're sorry, but our Q&A experts are temporarily unavailable.
Please check back later if you still haven't found the answer you need.

6 questions answered by our experts.
Sort by:
  • 1
Sorry, we couldn't find any existing answers that matched.Try using some different or simpler keywords, or submit your new question by using the "Ask a Question" button above!
Ian
July 20, 2017
I had to replace my drum motor belt not too long ago but now when I turn on my dryer it makes a loud screeching noise and then fades out after about 5 mins … do you think it is the drum support rollers? Don’t want to just guess around lol
PartSelect logo
Hello Ian, it does sound like you have a problem with either your drum support rollers or your idler pulley. We recommend first checking the rollers as that is the most common reason for loud screeching noises. Check them for wear and visible damage. The next step should be the idler pulley. Please let us know if you have any further questions!

15 people found this helpful.

Was this helpful?
Thank you for voting!
Andy
July 20, 2017
Me and my partner are venturing to replace the support rollers and the tumbler bearing kit and the drum belt. Do we need to replace the roller axel too? Thx
PartSelect logo
Hello Andy, first we recommend buffing out the axels with an emery cloth instead of replacing them if they are still in good condition. Then you should lubricate the roller bearing at the center opening, and the shafts with a few droplets of turbine oil. If you are replacing the idler pulley assembly you can repeat this process. Once this is all done you can start your installation. Best of luck with this repair!

12 people found this helpful.

Was this helpful?
Thank you for voting!
Gigi
July 20, 2017
Is this for a new or old style dryer? TIA
PartSelect logo
Hi Gigi, from what we can find this unit was most likely manufactured in the late 80’s to the early 90’s. I hope this helps!

10 people found this helpful.

Was this helpful?
Thank you for voting!
Ann
March 13, 2020
Dryer is working fine but rattles loudly like there are worn out ball bearings. No screeching, just the rattle. Which parts need replacing?
For model number DE312
PartSelect logo
Hello Ann, thank you for your question. That sounds like a drum roller and shaft issue. We would recommend replacing the rollers PartSelect Number: PS1570070 and the shafts PartSelect Number: PS11743031. You would want to order 2 of each part. I hope this helps.

2 people found this helpful.

Was this helpful?
Thank you for voting!
Related Parts:
Debra
October 7, 2022
So I removed the belts to check the pulleys. The motor pulley looks fine but it’s the motor shaft that the pulley goes on that is squeaking. Is that shaft replaceable? Or can I just oil or grease the shaft? Or do I need to replace the motor? ??
For model number LAT8204AAE
PartSelect logo
Hello Debra, thank you for your question. We have researched your model and found that the shaft is not replaceable and you need to replace the complete Motor Assembly, part number PS2003768. If you need help placing an order, customer service is open 7 days a week. Thanks again for your great question.

1 person found this helpful.

Was this helpful?
Thank you for voting!
Related Parts:
Connie
April 12, 2024
Dryer is very loud thumping - when turning Sounds like a log or two is being tumbled Clothes drying fine though
For model number LDE8706ADE
PartSelect logo
Hello Connie, thank you for reaching out. When the drive belt gets worn out or frayed, it often creates a thumping noise. We would recommend checking the drive belt, part number PS11757542, to fix the issue. Good luck with this repair!

Was this helpful?
Thank you for voting!
Related Parts:
  • 1
You May Also Need ?
Model Cross Reference
This part works with the following models:
PartSelect Number: PS11743031
Manufacturer Part Number: WP6-3129480
Brand
Model Number
Description
Roper
2570B00
Range - Electric
Roper
2570B10
Range - Electric
Crosley
CDE4205AYJ
Dryer - Residential
Crosley
CDE4205AYW
Dryer - Residential
Crosley
CDE4205AZJ
Dryer - Residential
Crosley
CDE4205AZW
Dryer - Residential
Crosley
CDG4205AWJ
Dryer - Residential
Crosley
CDG4205AWW
Dryer - Residential
Maytag
DE106
Dryer - Electric
Maytag
DE107
Dryer - Electric
Maytag
DE110
Dryer - Electric
Maytag
DE18CA
Dryer - Electric
Maytag
DE18CM
Dryer - Electric
Maytag
DE18CS
Dryer - Electric
Maytag
DE18CT
Dryer - Electric
Maytag
DE19CA
Dryer - Electric
Maytag
DE19CD
Dryer - Electric
Maytag
DE19CS
Dryer - Electric
Maytag
DE19CT
Dryer - Electric
Maytag
DE210
Dryer - Electric
Maytag
DE212
Dryer - Residential
Maytag
DE21CA
Dryer - Electric
Maytag
DE21CM
Dryer - Electric
Maytag
DE21CS
Dryer - Electric
Maytag
DE21CT
Dryer - Electric
Maytag
DE22CA
Dryer - Electric
Maytag
DE22CS
Dryer - Electric
Maytag
DE22CT
Dryer - Electric
Maytag
DE23CD
Dryer - Electric
Maytag
DE24CA
Dryer - Electric
Customer Service Representative

Get in touch, we're here to help!

Monday to Saturday
8am - 9pm EST

Contact Customer Service