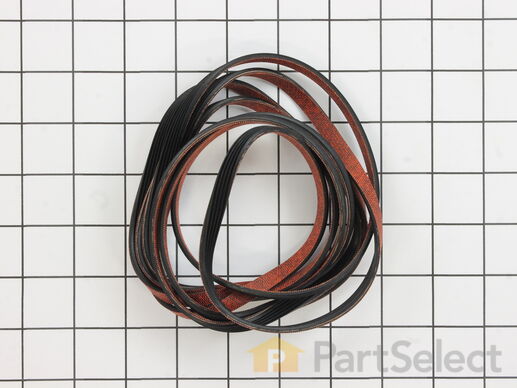
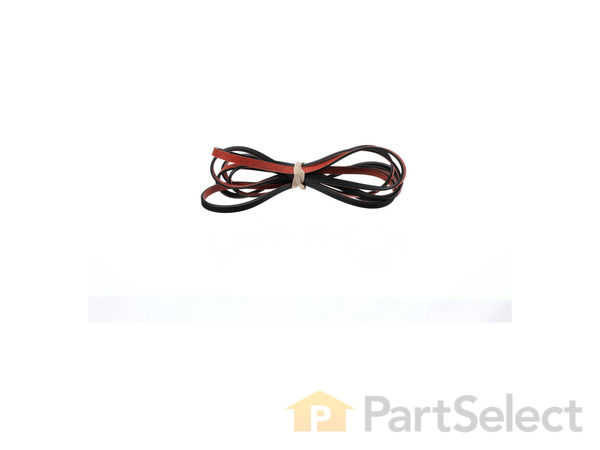
The tumbler and motor belt in your dryer allows the drum to spin during the drying cycle. At 100 inches in length, this dryer drum belt is 3/8 of an inch wide and has five ridges. The belt is black in color and it is made entirely of rubber. If your dryer will not tumble, is noisy during operation, or will not start you may need to replace the belt. To complete this repair, you will need to remove the front panel as well as the drum. You will need a 5/16 nut driver and a stubby Phillips screwdriver to complete the repair. Be sure to disconnect power to the dryer before you begin this repair. During the repair, make sure the belt doesn't fall into the groove in the drum, which will cause it to be too loose. You should be able to access the belt and replace it by removing the front panel and bulkhead.
How Buying OEM Parts Can Save You Time and Money
Part Videos
Replacing your Maytag Dryer Tumbler and Motor Belt
Keep searches simple. Use keywords, e.g. "leaking", "pump", "broken" or "fit".
Sorry, we couldn't find any existing reviews that matched. Try using some different or simpler keywords.
★★★★★
★★★★★
Corinna T - May 31, 2024
Verified Purchase
Works as expected
It came in a timely manner and my dryer is working again.
★★★★★
★★★★★
Michael G - May 3, 2024
Verified Purchase
Easy Repair after Part Received
The part was just what I needed, but came a little slower than expected. However, the repair went well, and I was pleased with the overall experience.
★★★★★
★★★★★
James D - January 29, 2024
Verified Purchase
This part worked as it should
Thanks to the video of the belt replacement, this repair went smooth.
★★★★★
★★★★★
Fred F - January 10, 2024
Verified Purchase
Correct part easy installation
Received part quick.
★★★★★
★★★★★
John G - October 19, 2023
Verified Purchase
Perfect fit
Awesome belt. Works perfectly. The higher quality helps!
★★★★★
★★★★★
Sharon M - September 29, 2023
Verified Purchase
Maytag dryer tumbler + motor belt
The part arrived quickly. Using the DIY video ,for installation ,was troublesome to follow ,near the end. The presenter blocks the view.
★★★★★
★★★★★
Thomas W - September 14, 2023
Verified Purchase
Easy repair
The part was in great condition and came fast!
★★★★★
★★★★★
Mark T - August 16, 2023
Verified Purchase
right part easy repair
the part was the right one for my dryer, fast shipping , quality part
★★★★★
★★★★★
David M - July 28, 2023
Verified Purchase
Perfect match
..
★★★★★
★★★★★
Nicolas F - June 22, 2023
Verified Purchase
Fits great
Awesome
< Prev
1
2
3
Next >
Customer Repair Stories
Average Repair Rating: 3.0 / 5.0, 216 reviews.
What's this?
Sort by:
< Prev
1
2
3
Next >
Search filter:
Clear Filter
Your search term must have 3 or more characters.
Keep searches simple. Use keywords, e.g. "leaking", "pump", "broken" or "fit".
Sorry, we couldn't find any existing installation instruction that matched.
Dryer would struggle to start, but never run.
When this dryer was given to me, I was told the door switch was going bad. It was originally purchased in 1996 as a REAL MAYTAG, so fixing it was no brainer, but the switch did not fix the problem. I pulled the small panel off the back to expose the motor and struggled to spin it by hand, so I assumed the motor was seizing up.
... Read morer />I entered the model number into this website and found a motor that would work and also decided to go with a belt and a fan. There was an installation video provided when I added the motor to my cart. The dryer was older than mine, but obviously identical on the interior. The only difference was that older dryer didn't have a little deflector shield that I have and I still can't remember where that goes. My dryer appears to be working just fine without it though.
Like the video stated: Remove two screws at the bottom of the front panel to remove the panel while disconnecting the door switch wires. Since I had an old switch, I took the three wires and plugged them into that so I would remember where each one went .
I believe after that was the fan housing with a few bolts, then the drum. I reached through the small back panel to loosen the belt by moving the tensioner back, then removing the drum. The fan was secured by a snap ring and a spring loaded hose clamp that required a small set of pliers.
There were two bolts that held the motor in; once removed, the motor slid out with the bracket. The tough part was using the screwdriver to get the clamps off that hold the motor to the bracket, but the video helped with that.
The new motor did not come with instructions on how to wire it, so I had to go to this site and find somebody who had asked the question. The video did not do all that great a job in showing me where the wires go and since the motor was different than my REAL MAYTAG motor, I had no idea where the wires went, but I found someone who asked the question and he got the answer, so I was able to figure it out.
It had been over a month since I had taken the dryer apart so I went back to that video which, except for the wiring and that tiny little deflector plate, provided excellent detail of how to install everything. I had trouble deciding where I wanted the wires to make sure the drum didn't rub on them, so after it was all back together, I watched the drum rotate with the dryer running from that little panel in the back.
One thing that saved me was every time I took something off, I kept the bolts with that item. It only became a problem when my friend came over and saw the dryer in pieces. He just had to give me his own lecture about fixing dryers and when he talks he has touch everything, so all my bolts are going flying! I was like, "What are you doing? Are you gonna put this back together for me after you lose all my bolts?"
old was belt stretched and idler pulley gummed up, drum won't tumble a normal sized load
Replaced all the parts per the very good video provided on the website. I recommend watching the video very closely several times. BE SURE THE BELT IS NOT IN THE DRUM'S GROOVE. The video mentions this very very briefly; I caught it on my third viewing. If your belt is not the correct location, it may still turn the drum for you - and
... Read more eat the belt up in about an hour.
1)Unplug dryer, 2)remove front door assembly, 3)remove the blower tumbler front, 4)disconnect belt, 5)eased out tumbler, 6) replace parts, 7)assembled in reverse order, 8) finally test operative. Wife rewarded me with peanut butter an jelly sandwich.
Squeaky when in use, after replacing the drum pads.
I followed the videos provided, the only think I would added is cleaning the riding surface of the drum. In my case the drum had gunk on it from the old pads, witch got on the new pads causing it to continued to make noise.
It would be wise to also get the felt and belt, to replace them all the first time.
Reviewed U Tube video instructions carefully,it was the best in the world.Told what tools needed to complete repairs and exactly how to go about making repairs.Only thing tumbler seal glue not clipped as shown in video. As it turned out tumbler seal not long enough to install in one piece needed use another seal.
I followed all of the instructional videos and things went very smoothly. Easy to follow. I replaced several other parts to avoid having to do other repairs later. I hope this should get us another 20+ years from this dryer.
Summary: I followed the instructions in the PartSelect.com repair video that was displayed on the motor part page on the site (video here: https://youtu.be/eXJMmn5mwMY).
Details: 1.) I turned off power to the dryer. 2.) I removed the front panel by removing the two screws on the bottom edge with a stubby #2 Phillips s
... Read morecrewdriver, then rotated the panel out until the clips released on the top edge. 3.) I noted the wire connections to the door switch, and then removed the three wires from the terminals on the door switch. I removed the door switch wire harness from the clips and moved it out of the way. 4.) I removed the blue wire from the dryness sensor and set it aside but left the other wire attached since it would come off with the bulkhead. 5.) I removed the front tumbler bulkhead by removing the four hex-head screws that secured it with a 5/16" nutdriver. I set the bulkhead aside. 6.) I reached back under the tumbler drum and slipped the drive belt off the idler pulley beside the motor, then pulled the tumbler drum straight out the front of the dryer. I also removed the belt as it was going to be replaced. 7.) I removed the two hex-head screws holding the guard plate over the temperature and thermal overload sensors with a 5/16" nutdriver and then removed the plate. 8.) I removed the single hex-head screw holding the blower housing to the base of the dryer with a 5/16" nutdriver, then removed the six hex-head screws on the front blower cover with a 3/16" nutdriver. I removed the front blower cover and set it aside. 9.) I removed the retaining ring holding the blower wheel from the blower shaft with a retaining ring pliers, then removed the spring clamp from the blower wheel hub with a pair of needlenose pliers. I used a flat-blade screwdriver to gently open up the slots on the blower wheel hub and was able to pull the blower wheel straight off the shaft. 10.) I removed the four hex-head screws attaching the rear blower housing to the motor mount with a 5/16" nutdriver, then removed the rear blower housing, making sure to gently remove it from the exhaust pipe as well. 11.) I detached the idler pulley spring from the idler pulley arm. 12.) I removed the two hex-head screws holding the motor mount to the base of the dryer with a 5/16" nutdriver, then slid the motor mount to the right do detach the tabs on the base from the mounting slots. I disconnected the wires from the motor (red, blue, grey, black and yellow) and moved the wiring harness out of the way.. 13.) I pulled the motor and motor mount out of the dryer and placed them on the workbench. Then I removed the retaining ring from the blower end of the motor shaft with retaining ring pliers. 14.) I removed the drive pulley from the shaft with a 3/16" hex key to loosen the set screw. This required a few taps on the key with a hammer. 15.) I removed the motor clips from each end of the motor with a flat-bladed screwdriver, pushing the locking tab on the clip down until it disengaged from the hook on the motor mount. 16.) I removed the motor from the motor mount and discarded it. 17.) I placed the new motor into the motor mount and aligned it so that the frame of the motor would not come in contact with the tumbler drum. I put the new motor clips back on with a flat-bladed screwdriver. 18.) I slid the drive pulley onto the drive shaft and lined it up with the belt mark on the idler pulley. Then I tightened the set screw with a 3/16" hex key and several light taps with the hammer. 19.) I placed the rear blower retaining clip onto the blower end of the shaft with the retaining ring pliers. 20.) The motor came with no wiring diagram, and the manufacturer also changed the starting switch with a different model. Some research on the PartSelect.com site yielded instructions on the correct terminal connections. The motor came with several 1/8" crimp connectors to replace the original 1/4" connectors on 2 of the wires. I used the wire strippers to cut the ends off the red and yellow wires, stripped 1/4" of insulation, and the used the crimping tool to crimp new 1/8" connectors on the red and yellow wires. 21.) I replaced the motor mount and motor back in the dryer and connected the wires to the correct terminals. There was a blue jumper wire on the motor that I removed per instructions so that the grey wire could connect to the motor thermal overload terminal. 22.) Reassembly was then the reverse of disassembly. The only tricky part was putting the new belt on and getting it threaded through the drive pulley and idler pulley in the correct orientation. While I had the drum out, I took the opportunity to lubricate the drum roller wheel bearings and the idler pulley bearing and to clean out the accumulated lint from some 20 years of operation.
The job took about 2 hours total, a good portion of which was spent figuring out the correct wiring for the new motor.
The dryer now works quietly and starts without issue.
Installation of drum support kit was difficult because my snap ring pliers would not fit in the snap ring holes. Had to use pliers and screw driver to get them off and to put them back on. That took much patience and time. Installation of front guides was a bit difficult because the rivets were loose and turned when trying to drill them o
... Read moreut. Also they were bigger and I needed a larger drill bit than the 1/8 told about in the video. Used drill, screw driver and pliers to get the rivets out. Also took more time and patience to do this. Belt did not need replacement but felt it a good idea to do it as long as I was in there. Belt installation was easy because my dryer has a rear view opening and I could use it to thread the belt. Tried it from the front as shown in the video just to see if I could and found it impossible. Could not even get my hands to hold the belt. Also vacuumed out 20 years of lint and dust that was inside the dryer. The videos were excellent in showing what to do and how to do it. Not sure how well I would have done without them.
We're sorry, but our Q&A experts are temporarily unavailable.
Please check back later if you still haven't found the answer you need.
28 questions answered by our experts.
Sort by:
< Prev
1
2
3
Next >
Search filter:
Clear Filter
Your search term must have 3 or more characters.
Keep searches simple. Use keywords, e.g. "leaking", "pump", "broken" or "fit".
Sorry, we couldn't find any existing answers that matched.Try using some different or simpler keywords, or submit your new question by using the "Ask a Question" button above!
Meghan
July 20, 2017
I just received my new drum belt and have started working on the installation. I managed to get inside and remove the damaged part but I can’t figure out how to get the belt around the drum. What haven’t I taken out yet that would make this easier? Am I doing this wrong?
Hi Meghan, you will need to remove the tumbler front 33001107 before you can replace the belt on your unit. I hope this helps!
32 people found this helpful.
Was this helpful?
Thank you for voting!
Bob
April 28, 2018
Not a question, but an answer to someone's question. After replacing the belt according to instructions, it was still too loose. After reviewing the video, i hear "make sure the belt isn't in the groove in the drum" - this is critical. If your belt's too loose, make sure it's around the drum, but not in the groove. After correcting this, the belt (and the dryer) are working fine.
For model number DE412
Hi Bob,
Thank you for taking the time to give us this information! I hope it will help other customers in the future. Thank you so much. Have a great day!
24 people found this helpful.
Was this helpful?
Thank you for voting!
Jacob
July 20, 2017
So Ive been googling which side of the belt faces down and the instructions are telling me one thing but google is telling me another. Can you confirm which way the grooves sit?
Hello Jacob, the belt is positioned flat side down. Please let us know if you have any further questions!
22 people found this helpful.
Was this helpful?
Thank you for voting!
Carrie
July 20, 2017
I’m trying to get the top opened so I can replace my broken drum belt but I can’t get inside. Am I not doing this correctly? Any tips?
Hi Carrie, instead of removing the top you can remove the front panel, there should be 2 screws in the bottom. Then you can remove the front bulk head from the dryer. From there you should be able to access the belt and replace it. Best of luck with this repair!
16 people found this helpful.
Was this helpful?
Thank you for voting!
Ken
December 5, 2017
Have new belt but is still to lose. Belt model number matches correct item. Needs more tension but can't figure out why
For model number Dg212
Hi Ken, Thank you for the question. I suggest checking the Idler Pulley Arm to make sure it is not wore out or bent.There should also be a Idler Spring on the Arm that will help with the belt tension.Hope this helps!
Hi, is the belt I need labeled 100 inches x 3/8? The belt frayed and snapped but everything else seems okay.
For model number DE110
Hello Brian,
Thanks for your question. Yes, this part is 100 inches by 3/8 inches.
I hope this helps.
8 people found this helpful.
Was this helpful?
Thank you for voting!
Henry
January 18, 2018
I bought what i thought was the correct belt when i told the parts dealer the model number. I have a Whirlpool belt with the model number 341241. Is that a belt that is supposed to be compatible?
For model number Lde7500acw
Hi Henry,
Thank you for your question. No, this belt would not be compatible with your dryer. Based on the model number you provided, the part number for the correct belt is PS11757542. I hope this helps. Thank you and have a great day!
5 people found this helpful.
Was this helpful?
Thank you for voting!
Michael
August 26, 2019
Are there different sizes for Maytag tumble dryers
Hi Michael,
Thank you for your question. Depending on what type of dryer you have, the length of the belt may be different from model to model. To verify the correct belt for your dryer, we would need the model number from it. I hope this helps. Thank you and have a great day!
5 people found this helpful.
Was this helpful?
Thank you for voting!
Al
December 27, 2019
Will this belt work for Maytag dg24cs dryer?
For model number DG24cs
Hello Al, thank you for your inquiry. We can confirm that tumbler and motor belt PS11757542 is compatible with your model DG24CS. I hope this information helps!
5 people found this helpful.
Was this helpful?
Thank you for voting!
Ty
July 19, 2019
What is the part number?
For model number LDE9334ACE
Hello Ty, thank you for your question. The part number for this Tumbler and Motor Belt is PS11757542. This is the correct replacement for your model. We hope this answers your question.