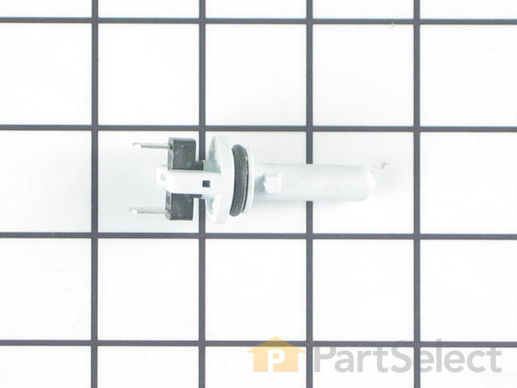
This part is used to regulate water temperature when certain cycles or options are selected. The thermistor is part of the sensor mounted in the tub.
How Buying OEM Parts Can Save You Time and Money
Troubleshooting
This part fixes the following symptoms:
Will Not Start | Not cleaning dishes properly
This part works with the following products:
Dishwasher.
Part# WP8269208 replaces these:
AP6012293, 8269208
Customer Repair Stories
Average Repair Rating: 2.4 / 5.0, 3 reviews.
What's this?
Sort by:
< Prev
1
Next >
Search filter:
Clear Filter
Your search term must have 3 or more characters.
Keep searches simple. Use keywords, e.g. "leaking", "pump", "broken" or "fit".
Sorry, we couldn't find any existing installation instruction that matched.
The light on the option panel "Hi-Temp Scour" is on.
I spent $290 in parts (4 in total). I replaced all of them. I resetted clicking 1,2,3 and 1,2,3 and 1,2 3 and then click the button normal. But The diswasher is still not working. The "hi-temp Scour" is still on. I would like to ask to the dishwasher technitian, why the diswasher is not working even I replaced the
... Read more 4 parts related to the temperature? I followed all videos to replace the 4 parts and resett the dishwasher, but the dishwasher is not working. Thanks.
Stopped Running,Will Not Start, and Clean LED Blinks 7 times then repeats
Got Maintenance Flyer out an read about problem Removed access plate Disconnectd water and drain Removed anchor screws Pulled unit out and disconnedted from Electric Flipped on it's back Ohmed out all heat related items and found discrepency with Thermisitor resistance Ordered and received Part Chan
... Read moreged out Thermisitor Checked wiring to Heater and replaced connections Hooked electric up Ran Diognostics per Maintenance flyer and cleared fault Hooked back up and ran like a champ
The reason it took so long is because I put the old thermisitor back in and tryed to run the diognostics just to make sure that was the problem
Dishwasher's "clean" light just blinked - wouldn't run. Repairman came and found out problem and suggested I could fix it myself
Since I had watched a repairman diagnose the problem, it was eash to reproduce how to pull the unit out from the wall and find the faulty part to remove it and replace it with the new thermistor. Two wires to disconnect and connect and repair nearly complete. Pushed it back in, screwed it back to the cabinet and installed foot plate and
... Read more done.
Read less
Peter from San Diego, CA
Difficulty Level:
Really Easy
Total Repair Time:
15 - 30 mins
Tools:
Screw drivers
15 of 22 peoplefound this instruction helpful.
Was this instruction helpful to you?
Thank you for voting!
< Prev
1
Next >
Questions and Answers
We're sorry, but our Q&A experts are temporarily unavailable.
Please check back later if you still haven't found the answer you need.
4 questions answered by our experts.
Sort by:
< Prev
1
Next >
Search filter:
Clear Filter
Your search term must have 3 or more characters.
Keep searches simple. Use keywords, e.g. "leaking", "pump", "broken" or "fit".
Sorry, we couldn't find any existing answers that matched.Try using some different or simpler keywords, or submit your new question by using the "Ask a Question" button above!
Pete
November 1, 2017
Where is the thermistor on this dish washer?How is it tested? What causes it to go bad?
For model number 66517379301
Hi Pete, Thank you for the question. The thermistor is part of the sensor mounted in the tub.You will need a Multi Meter to check for resistance. The resistance should be between 46K and 52K ohms of resistance at 77 degrees.Sorry I am not sure what caused the thermistor to go bad, it could have been just a defective part. Hope this helps!
1 person found this helpful.
Was this helpful?
Thank you for voting!
Gerard
February 22, 2018
Kitchen aid dishwasher - no power so I checked the thermal fuse - no continuity so I purchased a new fuse kit - powered back up just fine. Ran a normal wash with energy saver dry - dishwasher ran through a couple of cycles fine and then stopped - clean light is blinking seven times then repeats. I tried to reset by touching hi-temp scrub button the energy saver dry button 5 times but it will not clear. Could it be the thermistor or the control board or?
Hi Gerard, Thank you for the question. The most common reasons for this error is because the water coming from your household is just too cold. The dishwasher is expecting 110 degree water to enter your dishwasher, so if your pipes are cold, the water may only come in luke warm. To correct this issue, just run your faucet next to the dishwasher until the water coming out is hot. Hope this helps!
Was this helpful?
Thank you for voting!
Elliot
February 1, 2020
I need to replace a leaking thermistor. It is working, but slightly leaking. First, how does it remove, twist and pull? Do you have to push inward before twisting? Also can i just replace the o-ring? Thanks, elliot
For model number du1148xtpb6
Hi Elliot. We do not have experience with this specific model but it should just pull out. The o-ring is only sold as part of the assembly. Thank you for your question and good luck with your repair.
Was this helpful?
Thank you for voting!
K
October 22, 2023
Where exactly is the WP8269208 thermistor? How do I access it? Could it be the cause of the thermal fuse blowing consistently? Appreciate any help!
For model number GU1500XTLS2
Hi K, thank you for the question. Based on our research, the thermistor could be the cause of thermal fuse blowing. The thermistor is mounted in the tub. We have found the instructions to access the thermistor. These may not be of the same model but will help you to access it. You may need to follow these steps:
1. Using a screwdriver, un-thread the mounting screws securing the panels at the bottom front.
2. Remove both panels and set them aside.
3. Un-thread the screws securing the terminal box cover.
4. Un-thread the water supply line from the water supply valve
5. Disconnect the drain hose from the sink drain.
6. Open the dishwasher door and remove the mounting screws.
7. Un-thread the screws securing the thermistor to the sump.
8. Pull the thermistor out.
We hope this information helps!