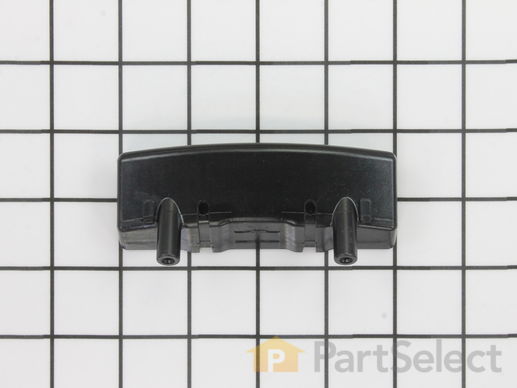
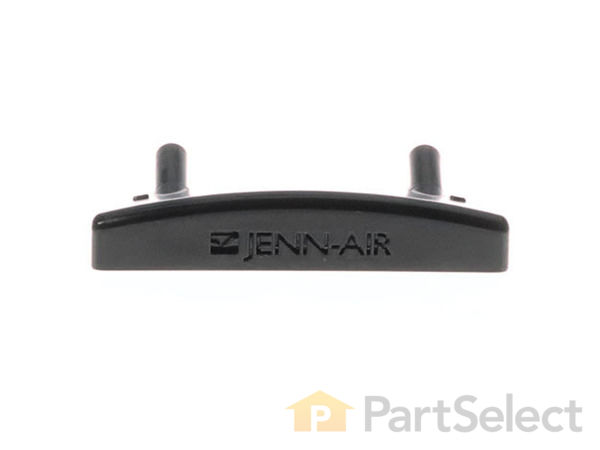
Part Location Diagram of WP99002839 Whirlpool Latch Handle
See part 10 in the diagram
( Grid squares measure 1x1 inch )
Customer Service Representative

Get in touch, we're here to help!

Monday to Saturday
8am - 9pm EST

customerservice@partselect.com

Latch Handle WP99002839

★★★★★
★★★★★
11 Reviews

Rated by 29 customers 

Easy 

15 - 30 mins 

Ratings submitted by customers like you who bought this part.

$ 74.24
  In Stock
Get FREE EconoShip on orders over $100! T&C apply

Get this part fast! Average delivery time for in-stock parts via standard shipping: 1.8 days.

Does this part fit my model?

Need help finding your model number?
PartSelect Number PS11747729
Manufacturer Part Number WP99002839
Manufactured by Whirlpool for Jenn-Air
Product Description

Latch Handle Specifications

Handle only.
How Buying OEM Parts Can Save You Time and Money

How Buying OEM Parts Can Save You Time and Money

Troubleshooting
This part fixes the following symptoms:
Door latch failure
This part works with the following products:
Dishwasher.
Part# WP99002839 replaces these:
AP6014490, 99002142, 99002143, 99002839, 99002840, WP99002840
Back to Top
Customer Reviews
Average Rating:
★★★★★
★★★★★
11 Reviews
3.0
Filter By Rating:
  • 5 Stars
    3
  • 4 Stars
    2
  • 3 Stars
    1
  • 2 Stars
    2
  • 1 Star
    3
Sort by:
  • 1
  • 2
Sorry, we couldn't find any existing reviews that matched. Try using some different or simpler keywords.
  • 1
  • 2
Customer Repair Stories
 Average Repair Rating: 3.9 / 5.0, 29 reviews. What's this?
Sort by:
  • 1
  • 2
  • 3
Sorry, we couldn't find any existing installation instruction that matched.
broken (cracked) handle
Loosened inside panel of door (taking out all screws in door) removing old handle (removing 2 screws) and replacing new handle in place (need to reuse screws from old handle as new ones not supplied) then put door panel back in place and tighten screws (be sure any inside padding is in correct place
  • Adrienne from CHAGRIN FALLS, OH
  • Difficulty Level:
    Easy
  • Total Repair Time:
    30 - 60 mins
  • Tools:
    Nutdriver, Socket set
1 person found this instruction helpful.
Was this instruction helpful to you?
Thank you for voting!
Latch handle was broken and cracked
Had to disassemble the door, using a Torx 20 driver to remove about 10 screws. Then pulled the door apart and used a 1/4" nut driver to remove two screws. Replaced the handle, reassembled the door and all worked normally! Easy repair for anyone with the confidence to take apart the door.
  • Jason from BOCA RATON, FL
  • Difficulty Level:
    Easy
  • Total Repair Time:
    15 - 30 mins
  • Tools:
    Nutdriver, Screw drivers
1 person found this instruction helpful.
Was this instruction helpful to you?
Thank you for voting!
handle broke on dishwasher
Removed old latch by removing back of door, unscrewed old handle which (big chunk missing) and replaced with new handle.
  • Ginger from Arlington, VA
  • Difficulty Level:
    Really Easy
  • Total Repair Time:
    Less than 15 mins
  • Tools:
    Screw drivers
1 of 2 people found this instruction helpful.
Was this instruction helpful to you?
Thank you for voting!
latch handle broken
sat down with a beer to evaluate problem. removed torx screws from inside of dishwasher. tried using beer to hold door down. spilled beer, so needed another. removed 2 screws holding handle on and spilled beer looking for them. attached handle and installed inner panel. all-in-all pretty good !!
  • tom from goodyear, AZ
  • Difficulty Level:
    A Bit Difficult
  • Total Repair Time:
    15 - 30 mins
  • Tools:
    Screw drivers
0 of 1 people found this instruction helpful.
Was this instruction helpful to you?
Thank you for voting!
the cheap plastic handle cracked.
Turn off the power supply to the appliance. There is wiring you could mess up if something goes wrong. Open the door. Remove the four (4) torx head stainless steel screws on each side of the interior door panel. (total of 8). Then remove the two (2) torx head stainless steel screws near the top of the door on either side of the latch. Before you pry the interior door panel off, have handy a non-metallic weight, such as a brick or heavy book.. When you pull the interior door panel loose, the weight difference will cause the springs to pull the door up and closed. The brick will hold it open while you replace the cheap plastic handle. Do not try to fully removal the interior door panel as there are electrical wires attached. Just lien the interior door panel up onto the lower dish tray. You will need a 5/16" hex nut driver to remove the two (2) screws that hold the plastic handle on. Then, just reverse the whole process.
  • David from Hampden, ME
  • Difficulty Level:
    Easy
  • Total Repair Time:
    Less than 15 mins
  • Tools:
    Nutdriver
2 of 3 people found this instruction helpful.
Was this instruction helpful to you?
Thank you for voting!
plastic handle cracked and broken
took old handle off (loosened two screws to do this) and replaced same way.......took two people only because one held the door separated while the other replaced the handle........
  • karen from forest lake, MN
  • Difficulty Level:
    Easy
  • Total Repair Time:
    15 - 30 mins
  • Tools:
    Screw drivers
6 of 11 people found this instruction helpful.
Was this instruction helpful to you?
Thank you for voting!
plastic latch handle cracked off
I removed the back panel of the door and just removed the nuts on the old broken handle and replaced it with the new h replaced the back panel of the door handle
  • Marie from Wyckoff, NJ
  • Difficulty Level:
    Really Easy
  • Total Repair Time:
    Less than 15 mins
  • Tools:
    Nutdriver, Screw drivers
1 of 2 people found this instruction helpful.
Was this instruction helpful to you?
Thank you for voting!
Handle and door cable were broken
Had to take door apart to put new handle on, and then pull out the unit from cabinet to put on the new cable. But door do longer slams open. So Happy that it is now fixed.
Other Parts Used:
Latch Handle Soft Drop Door Cable
  • Matthew from Morris, IL
  • Difficulty Level:
    A Bit Difficult
  • Total Repair Time:
    15 - 30 mins
  • Tools:
    Screw drivers, Socket set
2 of 24 people found this instruction helpful.
Was this instruction helpful to you?
Thank you for voting!
Handle was broken
Removed the screws that held the outside stainless door from the inside stainless door. There were only 10 screws that needed to be removed. Tied the interior door to the upper rack to keep it out of the way. This allowed for removal of the broken handle. There are only two screws that actually hold the handle on. I was disappointed at this point. The mechanism that actually opens the door was not going to stay in place without replacing the broken panel inside. The screws holding the latch mechanism are supposed to screw into a black plastic panel, but the area that they are supposed to go into was broken off, both of them! It is very difficult to tell from the parts selection if I can order the correct part to fix this problem. It appears that I need to spend another $36.00 to correct the problem completely.
  • Barbara from Grants Pass, OR
  • Difficulty Level:
    Easy
  • Total Repair Time:
    15 - 30 mins
  • Tools:
    Screw drivers
1 of 2 people found this instruction helpful.
Was this instruction helpful to you?
Thank you for voting!
Dishwasher made a grinding sound - very loud. Did a poor job cleaning.
I took the lower pump assembly apart to find the problem. The biggest challenge was figuring out how to remove the cover. In the center, the assembly is held together with a round plastic nut about 1.5 inches in diameter - simply rotate it counter-clockwise to remove. I then removed the pump housing and found the impeller broken in two and the disk that was supposed to be attached to the top of the pump housing broken off. This was causing the noise and greatly reduced efficiency of the pump. I replaced the impeller and upper pump housing (bought the gasket too since it is hard to remove the old one) and put everything back together using the diagrams provided on the site. While many rate this repair as "easy" - it is only after you figure everything out! If you knew exactly what you were doing, the project could be done in 10 minutes. I had to study the diagram and it took me some time to disassemble, figure out what was wrong, read posts, order parts and reassemble. I also replaced the handle which had broken on one side which was simple. Part select is outstanding - I've used this site for my fridge, oven and now dishwasher and have avoided expensive service calls. If you are technically inclined and patient, you can repair your own appliances.
Other Parts Used:
Latch Handle Dishrack Guide Rail Stop - gray Impeller Assembly Filter Guard
  • Brian from Elkridge, MD
  • Difficulty Level:
    A Bit Difficult
  • Total Repair Time:
    30 - 60 mins
  • Tools:
    Nutdriver, Screw drivers
12 of 14 people found this instruction helpful.
Was this instruction helpful to you?
Thank you for voting!
  • 1
  • 2
  • 3
Questions and Answers

We're sorry, but our Q&A experts are temporarily unavailable.
Please check back later if you still haven't found the answer you need.

1 question answered by our experts.
Sort by:
  • 1
Sorry, we couldn't find any existing answers that matched.Try using some different or simpler keywords, or submit your new question by using the "Ask a Question" button above!
Annie Meyer
August 24, 2017
How do you replace the handel?
For model number JDB7910AWB
PartSelect logo
Hi Annie, Thank you for your inquiry. This is fairly easy repair. Here is a repair story from one of our customer's who has done the repair, "Turn off the power supply to the appliance. There is wiring you could mess up if something goes wrong. Open the door. Remove the four (4) torx head stainless steel screws on each side of the interior door panel. (total of 8). Then remove the two (2) torx head stainless steel screws near the top of the door on either side of the latch. Before you pry the interior door panel off, have handy a non-metallic weight, such as a brick or heavy book.. When you pull the interior door panel loose, the weight difference will cause the springs to pull the door up and closed. The brick will hold it open while you replace the cheap plastic handle. Do not try to fully removal the interior door panel as there are electrical wires attached. Just lien the interior door panel up onto the lower dish tray. You will need a 5/16" hex nut driver to remove the two (2) screws that hold the plastic handle on. Then, just reverse the whole process." I hope this helps. Thank you and have a great day!

11 people found this helpful.

Was this helpful?
Thank you for voting!
  • 1
You May Also Need ?
Model Cross Reference
This part works with the following models:
PartSelect Number: PS11747729
Manufacturer Part Number: WP99002839
Brand
Model Number
Description
Jenn-Air
JDB6510AWF
Dishwasher - DISHWASHER
Jenn-Air
JDB6510AWG
Dishwasher - DISHWASHER
Jenn-Air
JDB6510AWK
Dishwasher - DISHWASHER
Jenn-Air
JDB6510AWP
Dishwasher
Jenn-Air
JDB6510AWR
Dishwasher - DISHWASHER
Jenn-Air
JDB6510AWU
Dishwasher - DISHWASHER
Jenn-Air
JDB7910AWB
Dishwasher
Jenn-Air
JDB7910AWW
Dishwasher
Jenn-Air
JDB8910AWB
Dishwasher
Jenn-Air
JDB8910AWS
Dishwasher
Jenn-Air
JDB8910AWW
Dishwasher
Jenn-Air
JDB9910AWB
Dishwasher
Jenn-Air
JDB9910AWS
Dishwasher
Jenn-Air
JDB9910AWW
Dishwasher
Customer Service Representative

Get in touch, we're here to help!

Monday to Saturday
8am - 9pm EST

Contact Customer Service