EasyApplianceParts is now PartSelect! We've merged our sites to provide a better shopping experience for you.   Full Details
Back
Back
Keep typing for more specific results...
Easy
Part Location Diagram of WB01X45506 GE RIVET ASSEMBLY ALL
See part 105 in the diagram
Customer Service Representative

Get in touch, we're here to help!

1-866-319-8402 Monday to Saturday
8am - 8pm EST

customerservice@partselect.com

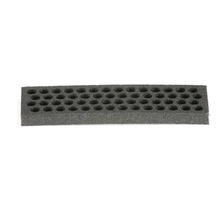
RIVET ASSEMBLY ALL WB01X45506

★★★★★
★★★★★
1 Review

Really Easy 

Less than 15 mins 

Rated by verified customers
$ Price Match Guarantee
$ 11.92
  In Stock

Does this part fit my model?

Need help finding your model number?
PartSelect Number PS18351014
Manufacturer Part Number WB01X45506
Manufactured by GE for General Electric
You May Also Need ?
Why buy the real thing?

OEM stands for Original Equipment Manufacturer. Simply put, this means that the company who made your appliance is also supplying the replacement part for it.

  • OEM from PartSelect
  • Genuine brand name
  • Guaranteed to fit
  • Superior quality and durability
  • 1 year warranty
  • Generic
  • Unknown manufacturer
  • No fit guarantee
  • Inconsistent quality and lifespan
  • Limited warranty and support
Troubleshooting
This part works with the following products:
Microwave, Wall Oven, Range.
Part# WB01X45506 replaces these:
WB01X10055
Back to Top
Customer Reviews
Average Rating:
★★★★★
★★★★★
1 Review
5.0
Filter By Rating:
  • 5 Stars
    1
  • 4 Stars
    0
  • 3 Stars
    0
  • 2 Stars
    0
  • 1 Star
    0
Sort by:
  • 1
Sorry, we couldn't find any existing reviews that matched. Try using some different or simpler keywords.
  • 1
Customer Repair Stories
 Average Repair Rating: 4.8 / 5.0, 3 reviews. What's this?
Sort by:
  • 1
Sorry, we couldn't find any existing installation instruction that matched.
The fan cover in the top of the microwave had a melted spot.
I used a flat screwdriver blade to push out the rivet. Then used the screwdriver to loosen the fan cover and gave it a little twist. It came out with no problem. There was some grease build up on the aluminum fan, so I cleaned it. I placed the clean fan into the new fan cover and put it back in place in the microwave. There are several notches to match up, and then I gave it a slight twist to secure the notches. Then, the new rivet was put into the hole and pushed to make it secure. Finished!
Other Parts Used:
Stirrer Fan Cover RIVET ASSEMBLY ALL
  • Deborah from SOUTHSIDE, AL
  • Difficulty Level:
    Really Easy
  • Total Repair Time:
    Less than 15 mins
  • Tools:
    Screw drivers
2 of 2 people found this instruction helpful.
Was this instruction helpful to you?
Thank you for voting!
Stirrer Fan Cover had burn holes
1. Removed the plastic rivet holding the stirrer fan cover in place.
2. Slipped a small pry bar under the cover to allow room to grip the cover and pull it out of its setting.
3. Removed the stirrer fan and placed in new cover.
4. Disposed of old rivet and cover.
5. Aligned new cover with rivet hole and pushed it up and into place.
6. The rivet comes in two (2) pieces: the actual rivet and a locking collar.
7. Pushed the rivet locking collar in place and pushed rivet into the collar.
Other Parts Used:
Stirrer Fan Cover RIVET ASSEMBLY ALL
  • Thomas from SUMMERVILLE, SC
  • Difficulty Level:
    Easy
  • Total Repair Time:
    Less than 15 mins
5 of 5 people found this instruction helpful.
Was this instruction helpful to you?
Thank you for voting!
cover stirrer fan was burned and sparking in three part even the plastic rivet
just in 1 2 3 step easy way. First unplug the power cord,use a small flat-head screwdriver to pull out the plastic rivet pin,rotate the old cover counter clockwise to removed lift out the blade assembly, install the new cover stirrer fan by first positioning the blade assembly then align the cover and rotate it clockwise to secure, then replace the mounting plastic rivet pin;with the repair completed, plug the power cord back in and your microwave oven should be ready for use again. : )
Other Parts Used:
Stirrer Fan Cover RIVET ASSEMBLY ALL
  • Steven from UTICA, NY
  • Difficulty Level:
    Really Easy
  • Total Repair Time:
    Less than 15 mins
  • Tools:
    Screw drivers
12 of 15 people found this instruction helpful.
Was this instruction helpful to you?
Thank you for voting!
  • 1
Questions and Answers

Be the first to ask our experts a question about this part!

Customer Service Representative

Get in touch, we're here to help!

1-866-319-8402 Monday to Saturday
8am - 8pm EST

Contact Customer Service