Part Location Diagram of 279838 Whirlpool Heating Element - 240V 5400W
See part 17 in the diagram
Replacing your Whirlpool Dryer Heating Element - 240V 5400W
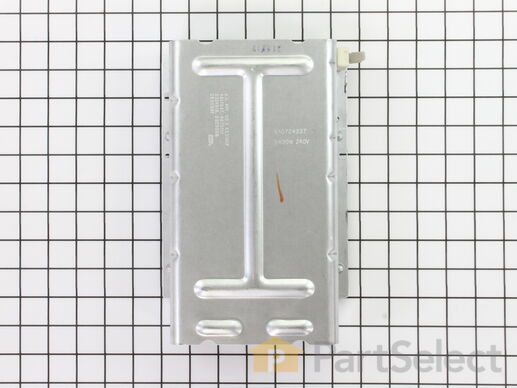
( Grid squares measure 1x1 inch )
Customer Service Representative

Get in touch, we're here to help!

Monday to Saturday
8am - 9pm EST

customerservice@partselect.com

Heating Element - 240V 5400W 279838

★★★★★
★★★★★
259 Reviews

Rated by 282 customers 

Easy 

15 - 30 mins 

Ratings submitted by customers like you who bought this part.

$ 64.84
  In Stock

Get this part fast! Average delivery time for in-stock parts via standard shipping: 1.8 days.

Does this part fit my model?

Need help finding your model number?
PartSelect Number PS334313
Manufacturer Part Number 279838
Manufactured by Whirlpool for Whirlpool, Kenmore, Roper, KitchenAid
Product Description

Heating Element - 240V 5400W Specifications

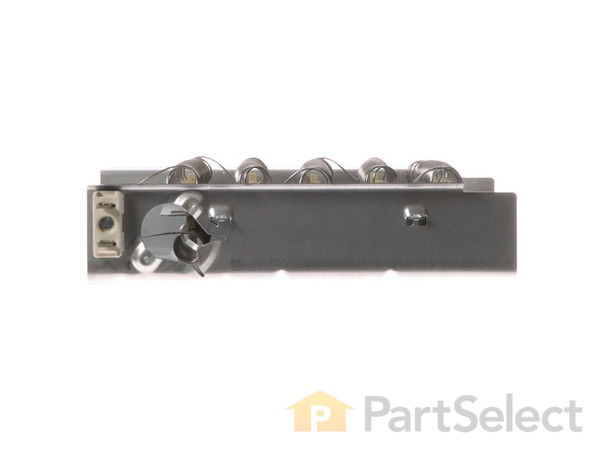
The heating element (Flat Can Heating Element 5400W, Heating Element, Whirlpool Dryer Heating Element, Dryer Heating Element) provides heat to the dryer. It is metal and measures 10.5 inches long, 7.5 inches wide, 2 inches deep. The element attaches to the heater housing. This part can break as a result of wear and tear. This can be material fatigue or prolonged high temperature exposure. If broken your clothes may not dry because of a lack of heat. It must be replaced when there is no longer continuity between the terminals. First check the thermal fuse on the blower housing before deciding to replace the heating element.
How Buying OEM Parts Can Save You Time and Money

How Buying OEM Parts Can Save You Time and Money

Part Videos
Difficulty: Easy | Tools Required: Nutdriver,Pliers
Repair Tip: Disconnect the power supply to your dryer before starting your installation in order to ensure a safe repair.

Replacing your Whirlpool Dryer Heating Element - 240V 5400W

Replacing your Whirlpool Dryer Heating Element - 240V 5400W

Test If Your Electrical Part is Failing - Multimeter Tool

Test If Your Electrical Part is Failing - Multimeter Tool
Troubleshooting
This part fixes the following symptoms:
Not Heating | Too hot | Heat stays on after drum has stopped | Touchpad does not respond
This part works with the following products:
Dryer.
Part# 279838 replaces these:
AP3094254, 2438, 279838, 279837, 279838A, 279838VP, 3398063, 3398064, 3403585, 8565582, W10724237, WP279837
Back to Top
Customer Reviews
Average Rating:
★★★★★
★★★★★
259 Reviews
4.8
Filter By Rating:
  • 5 Stars
    227
  • 4 Stars
    22
  • 3 Stars
    4
  • 2 Stars
    1
  • 1 Star
    5
Sort by:
  • 1
  • 2
  • 3
Sorry, we couldn't find any existing reviews that matched. Try using some different or simpler keywords.
  • 1
  • 2
  • 3
Customer Repair Stories
 Average Repair Rating: 4.0 / 5.0, 282 reviews. What's this?
Sort by:
  • 1
  • 2
  • 3
Sorry, we couldn't find any existing installation instruction that matched.
Timer and heating element stopped working
Followed the video on your site.
Other Parts Used:
Timer Heating Element - 240V 5400W
  • pamala from EAU CLAIRE, MI
  • Difficulty Level:
    Really Easy
  • Total Repair Time:
    30 - 60 mins
  • Tools:
    Nutdriver
10 of 10 people found this instruction helpful.
Was this instruction helpful to you?
Thank you for voting!
No heat, everything else worked fine.
Installed the new High Limit Thermostat onto the new Heating element and installed the unit on the dryer. Wires were then connected and the dryer was tested. Repair complete. Dryer is 25 years old and this is its first repair.
Other Parts Used:
Dryer High Limit Thermostat Heating Element - 240V 5400W
  • STEVEN from MORA, MN
  • Difficulty Level:
    Easy
  • Total Repair Time:
    Less than 15 mins
  • Tools:
    Nutdriver
10 of 13 people found this instruction helpful.
Was this instruction helpful to you?
Thank you for voting!
The dryer took at least 3 rounds to dry light clothes and 4-5 for towels.
This was my second time making repairs. The only difference this time I replaced all parts from top to bottom. When I pulled the heating element out only one coil was working the others had burned out. It was easy to do and the videos on the site are very helpful and informative. I followed the steps and if I thought I missed a step I replayed it again. I am a woman and found it very easy and not at all intimidating at all. I am going to hopefully have it for another 10 yrs. You guys keep up the good work.
Other Parts Used:
Timer - 230V 60Hz Push-To-Start Switch Lint Trap Housing Seal Dryer Thermal Fuse Dryer Cycling Thermostat Heating Element - 240V 5400W Thermal Cut-Off Kit
  • Stacey from CHUNCHULA, AL
  • Difficulty Level:
    Easy
  • Total Repair Time:
    1- 2 hours
  • Tools:
    Nutdriver, Socket set
10 of 15 people found this instruction helpful.
Was this instruction helpful to you?
Thank you for voting!
Replaced bulb, door switch and heating element.
I followed the instructions that I watched on the video. The video was very helpful.
Other Parts Used:
Dryer Door Switch Light Bulb - 10W Heating Element - 240V 5400W
  • Morris from ODESSA, TX
  • Difficulty Level:
    Really Easy
  • Total Repair Time:
    30 - 60 mins
  • Tools:
    Screw drivers, Socket set
3 of 3 people found this instruction helpful.
Was this instruction helpful to you?
Thank you for voting!
Would not heat properly.
Removed back panel to access the heating element. removed the old element and also removed the thermal cut out from the old assembly. installed the thermal cut out on the new element, reinstalled the new element, replaced rear cover. Started the unit and had heat.

The other part was a knob for a for a 37 year old Magic Chef electric stove. matched exactly what was there.
Other Parts Used:
KNOB- SELE Heating Element - 240V 5400W
  • WILLIAM from WAGENER, SC
  • Difficulty Level:
    Very Easy
  • Total Repair Time:
    15 - 30 mins
  • Tools:
    Nutdriver, Pliers
5 of 5 people found this instruction helpful.
Was this instruction helpful to you?
Thank you for voting!
Dryer was getting too hot, metallic burning smell
To replace the thermostat and heating element, I followed the video from PartSelect.

Before buying the parts, I had already taken my machine apart to clean it and check for lint build up, but there was only a bit of dust, no major blockages. Because the burning smell was metallic, I just had my fingers crossed that replacing the heating element and thermostat would do the trick. It worked!
There is an odd ceramic sort of smell in the first 5 minutes of using the new element but that went away and all is working well at this point.

My components looked slightly different from those on the video; I had fewer wires so I just took photos of everything before I started to make sure I put it all back in the correct place.
I had to watch another video on how to easily remove the thermostat, mine was stuck. I just used a flat head screw driver behind it like a lever and gently pried it off.
It took me about 30 minutes total only because I had to watch a couple of extra YouTube videos due to the differences of my machine. I don’t usually do repairs like this one and wanted to be completely sure I was doing it correctly, but the work/repair itself was super easy.

The lint trap seal was just because mine got damaged when I took it apart to clean it. I just pulled the old one off, made sure the old adhesive was completely removed, (it peeled off like scotch tape), I cleaned it, then I slowly went around the edge of the vent/housing and stuck the new foam seal down. No video required, just common sense.
Other Parts Used:
Dryer High Limit Thermostat Lint Trap Housing Seal Heating Element - 240V 5400W
  • Hayley from ALEXANDRIA, LA
  • Difficulty Level:
    Really Easy
  • Total Repair Time:
    30 - 60 mins
  • Tools:
    Screw drivers
3 of 4 people found this instruction helpful.
Was this instruction helpful to you?
Thank you for voting!
Heating Element went bad, melting a wire
*as with all electrical repairs I unplugged dryer from the outlet*

I disconnected the wires to the heating element, removed the 2 nut screws holding the heating element in place and removed the defective heating element. It looked like the heating element had darkened on the lower end and the wire terminals definitely looked like they had built some resistance that lead to the connection wire melting.

I slid the new heating element in and replaced the 2 screws. I cut the melted portion of the connection wire about 1/2" beyond the melted area and stripped the wire jacket exposing clean wire. I took the connection kit & clean wire lead, divided the wires into 2 groups on each end and braided them together and twisted them to a hand tight grouping. I then took the lead cap and twisted into onto the braided wire connection until it was also hand tight and snug.

I then reconnected the heating element connection wire back to the terminal end of the heating element and made sure all connections were snug.

I plugged the dryer back in, reset the dryer by turning the dial to a timed setting then back to off. I set the heat to low turned the dial to a time dry and turned on the dryer to ensure the element heated up and that the wired connection was secure. After 20 - 30 seconds, the element maintained heat and no issues were found with the fixed wire.

I replaced the dryer back and all screws and reconnected the vent hose. Dryer has worked great for the last few weeks with no issues. I was really surprised it was that easy to fix.
Other Parts Used:
Heating Element - 240V 5400W Heating Element Connection Wire Kit
  • Ryan from INDIANAPOLIS, IN
  • Difficulty Level:
    Really Easy
  • Total Repair Time:
    15 - 30 mins
  • Tools:
    Nutdriver, Pliers
8 of 8 people found this instruction helpful.
Was this instruction helpful to you?
Thank you for voting!
Stopped drying
Steve video
Other Parts Used:
Cycling Thermostat - Limit 135/155 Dryer Thermal Fuse Heating Element - 240V 5400W
  • Vincent from Kenly, NC
  • Difficulty Level:
    Very Easy
  • Total Repair Time:
    30 - 60 mins
  • Tools:
    Socket set
4 of 4 people found this instruction helpful.
Was this instruction helpful to you?
Thank you for voting!
No heat due to broken element coil
Turn off the breaker to the unit or unplug. Disconnect the 3 wires, 2 hex screws keep the element in place. it swivels or slides out. keep the thermal fuse from the old unit, it disconnects from the spade lug and pops off.
  • daryl from MADISON, TN
  • Difficulty Level:
    Really Easy
  • Total Repair Time:
    15 - 30 mins
  • Tools:
    Nutdriver
2 of 2 people found this instruction helpful.
Was this instruction helpful to you?
Thank you for voting!
Dryer quit drying
Watched a couple of you tube videos, seemed simple enough. Used multimeter to test thermostats, still good. Took off the heating element, it was visually broken. Called the 800 number, the guy who answered told me how to find the model number of the dryer. He then told me the part number and it matched what I had. Ordered, 2 days later arrived, just plugged it in and reinstalled the back covering, works great!
  • Jeff from BANDERA, TX
  • Difficulty Level:
    Really Easy
  • Total Repair Time:
    15 - 30 mins
  • Tools:
    Nutdriver, Screw drivers
1 of 2 people found this instruction helpful.
Was this instruction helpful to you?
Thank you for voting!
  • 1
  • 2
  • 3
Questions and Answers

Ask our experts a question about this part and we'll get back to you as soon as possible!

130 questions answered by our experts.
Sort by:
  • 1
  • 2
  • 3
Sorry, we couldn't find any existing answers that matched.Try using some different or simpler keywords, or submit your new question by using the "Ask a Question" button above!
Garcia
July 20, 2017
Diagnosing through your repair forum I think I may need a new heating element. The problem is that although my clothes are drying and my machine is heating up it takes a few go’s to actually dry the load. What is the most common reason this happens?
PartSelect logo
Hello Garcia, your symptoms are a common sign of a clogged venting system. We recommend checking the venting system, and cleaning it out. When doing this make sure to clean the pipe and the dryer. Please let us know if you have any further questions.

117 people found this helpful.

Was this helpful?
Thank you for voting!
Simon
July 20, 2017
I wasn’t getting enough heat in my dryer so I had to install the heating element. With that said theres a glow emitting from the back of the dryer and its bright red when the dryer is running. Is this suppose to happen, is this a fire hazard, is the element being over worked?
PartSelect logo
Hi Simon, if the housing is installed right, the element is meant to glow red hot and should not be hazardous. This is normal. Just make sure that the element is cycling on and off when the dryer is running, it is not meant to stay red hot the whole time. I hope this helps.

79 people found this helpful.

Was this helpful?
Thank you for voting!
Lula
July 20, 2017
Replacing my heating element but it doesn’t say what the continuity should read.
PartSelect logo
Hello Lula, the heating element on your dryer should read closed for the continuity. Best of luck with this repair.

32 people found this helpful.

Was this helpful?
Thank you for voting!
Steve
September 5, 2017
Hi, i am having trouble with my dryer drying the cloths. It gets hot if i set it for 60 min. But then cools down after a while and never gets hot again. The cloths don't get dry and i have to set it again for 60 min. Then it gets hot and finishes drying. I have replaced the three thermostats, cleaned all lint out. Can't figure it out. Could it be the temperature setting? The heating coil looks ok , no breaks in the coils. Pleas help with any suggestions. Thanks.
For model number 11061202011
PartSelect logo
Hi Steve, Thank you for your inquiry. There are a few parts that could cause that problem. The thermostats being some of them. Have you also checked or replaced your thermal fuse? You may also want to test your heating element electrical connection to make sure that is still good. It could also be your temperature switch that is giving you the issue as well. I hope that gives your some more avenues to check out. Good luck with your repair.

30 people found this helpful.

Was this helpful?
Thank you for voting!
Beverly
November 13, 2017
Is it possible for this element to go partially out ? And if so what should i do ? Replace the element anyway
For model number WED49STBW1
PartSelect logo
Hi Beverly, Thank you for your question. It can partially go out. I would suggest replacing it if it has. You can test this part with a multi meter to double check. If that part is working, I would suggest then testing your high limit thermostat and your thermal limit as well. Those two parts that are directly on the housing for your heating element. It could just be that one or both of those parts have gone out. You can also test those two thermostats with your multi meter. They should both read 0 ohms when you test them. I hope that helps. Good luck with your repair.

25 people found this helpful.

Was this helpful?
Thank you for voting!
Marshall
October 9, 2017
Ok this dryer is currently blowing cool air just want to make sure all i need is a heating element for this unit. It appears everything else is working fine relative to unit
For model number REX6634PQ0
PartSelect logo
Hi Marshall, Thank you for your question. If you have tested the heating element and it is bad, then that should be the only part you need. It may not hurt testing your thermal fuse and thermostats as well. Just to be sure. Good luck with your repair.

24 people found this helpful.

Was this helpful?
Thank you for voting!
Sam Cooke
August 8, 2017
Should I also install a new high limit thermostat when I install the heating element?
For model number WED5530SQ0
PartSelect logo
Hi Sam, Thank you for the question, You can reuse the thermostat you have but we recommend replacing both at the same time. Good luck with this repair!

14 people found this helpful.

Was this helpful?
Thank you for voting!
Chuck
November 22, 2017
No heat comes on when dial is set on timed dry but heat will come on when dial is set on automatic dry - any idea what part or parts need to be replaced.Thanks,chuck
For model number wed5200vq1
PartSelect logo
Hi Chuck, Thank you for your inquiry. If the timer is working on automatic dry and not on timed dry, it sounds like the timed dry option is the option that is frequently used when drying and it is worn out. You will need to replace the timer. I hope this helps. Thank you and have a great day!

12 people found this helpful.

Was this helpful?
Thank you for voting!
Josh
January 25, 2018
Getting no heat on auto sense dry but it is heating up on timed dry. Any ideas?
For model number RED4440VQ1
PartSelect logo
Hello Josh, Thanks for your question. Test the heating element for continuity with a multimeter, along with the thermal fuse, thermal cut-off kit, internal-bias thermostat, and high-limit thermostat. If all of these parts are testing properly for continuity, consider replacing the timer. I hope this helps.

12 people found this helpful.

Was this helpful?
Thank you for voting!
Related Parts:
Louise
February 18, 2018
My dryer appears to have only one wire connected to the heater element. It appears in your video that you removed two wires. Thank you
For model number LER7646EQ2
PartSelect logo
Hi Louise, Thank you for the question. The video may not match every model %100. If your model has one wire connections then you will just need to connect the one wire and ignore the second wire instructions in the video. Good luck with the repair!

12 people found this helpful.

Was this helpful?
Thank you for voting!
  • 1
  • 2
  • 3
You May Also Need ?
Model Cross Reference
This part works with the following models:
PartSelect Number: PS334313
Manufacturer Part Number: 279838
Brand
Model Number
Description
Kenmore
1106012510
Dryer - ELECTRIC DRYER
Kenmore
1106012990
Dryer - Kenmore Dryer Model 110.6012990 (1106012990, 110 6012990) Parts
Kenmore
11060222511
Dryer - ELECTRIC DRYER
Kenmore
11060602990
Dryer
Kenmore
11060612990
Dryer
Kenmore
1106062110
Dryer
Kenmore
11060702990
Dryer
Kenmore
11060722990
Dryer
Kenmore
11060727990
Dryer
Kenmore
11060817990
Dryer
Kenmore
11060832990
Dryer
Kenmore
1106085299
Dryer - Kenmore Dryer Model 110.6085299 (1106085299, 110 6085299) Parts
Kenmore
11060852990
Dryer
Kenmore
11060854990
Dryer
Kenmore
11060857990
Dryer
Kenmore
11060882990
Dryer
Kenmore
11060884990
Dryer
Kenmore
11060887990
Dryer
Kenmore
11061202011
Dryer
Kenmore
11061252010
Dryer
Kenmore
11061262311
Dryer - ELECTRIC DRYER
Kenmore
11061802000
Dryer
Kenmore
11061804000
Dryer
Kenmore
11061812000
Dryer
Kenmore
11061814000
Dryer
Kenmore
1106192311
Dryer - ELECTRIC DRYER
Kenmore
11062102310
Dryer - 29" ELECTRIC DRYER
Kenmore
11062202101
Dryer
Kenmore
11062212100
Dryer
Kenmore
11062212101
Dryer
Customer Service Representative

Get in touch, we're here to help!

Monday to Saturday
8am - 9pm EST

Contact Customer Service