Part Location Diagram of 279973 Whirlpool High Limit Thermostat and Thermal Cut-Off Kit
See part 47 in the diagram
Replacing your Whirlpool Dryer High Limit Thermostat and Thermal Cut-Off Kit
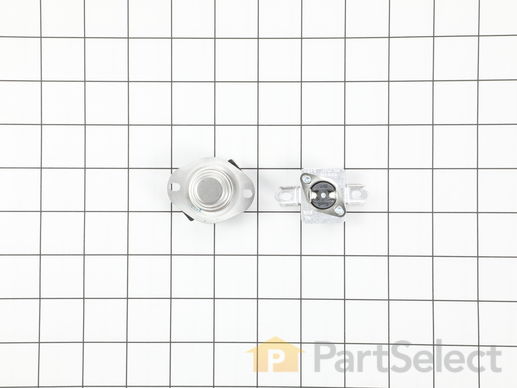
( Grid squares measure 1x1 inch )
Customer Service Representative

Get in touch, we're here to help!

Monday to Saturday
8am - 9pm EST

customerservice@partselect.com

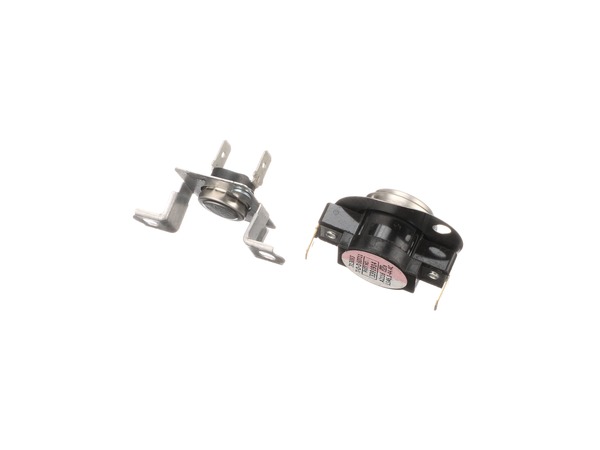
High Limit Thermostat and Thermal Cut-Off Kit 279973

★★★★★
★★★★★
21 Reviews

Rated by 12 customers 

Easy 

30 - 60 mins 

Ratings submitted by customers like you who bought this part.

$ 53.23
  In Stock
Get FREE EconoShip on orders over $100! T&C apply

Get this part fast! Average delivery time for in-stock parts via standard shipping: 1.8 days.

Does this part fit my model?

Need help finding your model number?
PartSelect Number PS334387
Manufacturer Part Number 279973
Manufactured by Whirlpool for Whirlpool, Maytag, Kenmore, KitchenAid
Product Description

High Limit Thermostat and Thermal Cut-Off Kit Specifications

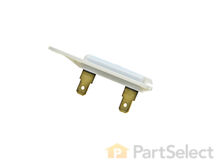
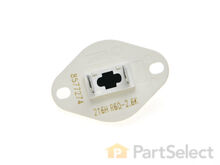
Also known as Thermal Cut-Off kit. The thermostat acts as a safety mechanism that keeps the dryer from overheating and the fuse is like a backup system - it's set to trip at a higher temperature than the thermostat. Once it trips, it has to be replaced.
How Buying OEM Parts Can Save You Time and Money

How Buying OEM Parts Can Save You Time and Money

Part Videos

Replacing your Whirlpool Dryer High Limit Thermostat and Thermal Cut-Off Kit

Replacing your Whirlpool Dryer High Limit Thermostat and Thermal Cut-Off Kit
Troubleshooting
This part fixes the following symptoms:
Too hot | Not Heating
This part works with the following products:
Dryer, Washer Dryer Combo.
Part# 279973 replaces these:
AP3094323, 897710, 279973, 279973VP, 3391913, 3404151, 3404152, 3977395, 8318314
Back to Top
Customer Reviews
Average Rating:
★★★★★
★★★★★
21 Reviews
4.3
Filter By Rating:
  • 5 Stars
    16
  • 4 Stars
    1
  • 3 Stars
    1
  • 2 Stars
    1
  • 1 Star
    2
Sort by:
  • 1
  • 2
  • 3
Sorry, we couldn't find any existing reviews that matched. Try using some different or simpler keywords.
  • 1
  • 2
  • 3
Customer Repair Stories
 Average Repair Rating: 3.6 / 5.0, 12 reviews. What's this?
Sort by:
  • 1
  • 2
Sorry, we couldn't find any existing installation instruction that matched.
wouldn't heat
watched videos on this site
Other Parts Used:
Blower Housing Seal Dryer Thermal Fuse Dryer Heating Element High Limit Thermostat and Thermal Cut-Off Kit
  • Tammy from PINEVILLE, MO
  • Difficulty Level:
    A Bit Difficult
  • Total Repair Time:
    30 - 60 mins
  • Tools:
    Screw drivers, Socket set
7 of 9 people found this instruction helpful.
Was this instruction helpful to you?
Thank you for voting!
Dryer would not heat
On this model do not try to remove the back. You must remove the bottom front panel and the lint screen unit. You can then loosen the heat coil assembly and rotate it to get to the high-limit thermostat and the thermal unit. I replaced both because I bought the kit. It actually took me longer to clean out lint than it did to replace the parts. A simple remove of the parts with a 1/4 inch nut driver did the trick. Now my dryer works fine.
  • GARY from PARSONS, KS
  • Difficulty Level:
    Really Easy
  • Total Repair Time:
    30 - 60 mins
  • Tools:
    Nutdriver, Screw drivers
4 of 4 people found this instruction helpful.
Was this instruction helpful to you?
Thank you for voting!
Dryer does not heat but blows only cold air
Pulled the lower front panel located thermal switch pulled 2 wires removed 2 small bolts pulled switch out set meter to ohms scale and tested between the 2 terminals it hailed the test I reversed for installation of new switch
  • kevin from RENTON, WA
  • Difficulty Level:
    Easy
  • Total Repair Time:
    30 - 60 mins
  • Tools:
    Screw drivers, Socket set
5 of 5 people found this instruction helpful.
Was this instruction helpful to you?
Thank you for voting!
HEATING ELEMENT open circuit
replacing the heating element was difficult due to the small area to work with and the defective element was difficult to slide out from housing.
Other Parts Used:
Dryer Heating Element High Limit Thermostat and Thermal Cut-Off Kit
  • Fred from ROCKINGHAM, VA
  • Difficulty Level:
    A Bit Difficult
  • Total Repair Time:
    30 - 60 mins
  • Tools:
    Socket set
1 person found this instruction helpful.
Was this instruction helpful to you?
Thank you for voting!
Dryer working fine but no heat
Found this website and reviewed videos and comments prior to purchasing the heater element and high limit thermostat and thermal fuse kit. We had recently put our Whirlpool duet washer and dryer on pedestals and after that, the dryer would come on and run, but would not heat up. Installation of the parts we ordered was simple...and we would be considered novice installers....really great website and easy to understand. Customer service was excellent as well. After installation of the parts, still no heat and heating element was registering only 120v. We checked everything again and found that the dryer plug was not all the way in the socket. Probably came loose with the move to the petestal.....plugged it in securely and it works great now. Should have checked that first, but because it was running we just didn't think of checking it. Good lesson learned and so glad we found this website. We will definately be using this site again and telling everyone we know about how great you guys are! And at least we won't have to worry about the dryer for a while and we now know we can fix a dryer that won't heat up!
Other Parts Used:
Dryer Heater Element High Limit Thermostat and Thermal Cut-Off Kit
  • Cornelius from ELKO, GA
  • Difficulty Level:
    Really Easy
  • Total Repair Time:
    15 - 30 mins
  • Tools:
    Nutdriver, Screw drivers, Socket set
18 of 20 people found this instruction helpful.
Was this instruction helpful to you?
Thank you for voting!
No heat
Took the back off the dryer. Found heating element unhooked the electrical connectors to the element,the high temp thermostat and the fuse backup. Opened the front kick plate, took the casing with element, ht thermostat and fuse bu out. Changed all three parts and reinstalled them. Turned on dryer and had heat. Been working great ever since.
Other Parts Used:
High Limit Thermostat - L295-50F Dryer Heating Element High Limit Thermostat and Thermal Cut-Off Kit
  • Richard from HAGERSTOWN, MD
  • Difficulty Level:
    Easy
  • Total Repair Time:
    30 - 60 mins
  • Tools:
    Nutdriver, Pliers, Screw drivers
6 of 6 people found this instruction helpful.
Was this instruction helpful to you?
Thank you for voting!
Dryer not heating
Open breaker and ensure power was off. Checked heating components for continuity.Found thermal fuse had an open circuit.Replaced High limit thermostat and thermal fuse.Now is a good time time check for free flowing vent piping.I discovered mine was crimped below the floor and caused lint build up and obstructing the flow which could have led to the thermal fuse blowing.I replaced the vent piping as well.My wife says the dryer works better now than it ever has.
  • Stephen from Andalusia, AL
  • Difficulty Level:
    Easy
  • Total Repair Time:
    30 - 60 mins
  • Tools:
    Nutdriver, Wrench (Adjustable)
12 of 22 people found this instruction helpful.
Was this instruction helpful to you?
Thank you for voting!
My Dryer Was Not Heating Up.
I asked for advise, looked around and priced heating elements and thermostats. This was the best combo offered for the price given. It was shipped and received it very quick. Installed it and 5 minutes later, she was running like a champ!
Other Parts Used:
Dryer Heater Element High Limit Thermostat and Thermal Cut-Off Kit
  • roberto from houston, TX
  • Difficulty Level:
    Really Easy
  • Total Repair Time:
    Less than 15 mins
  • Tools:
    Socket set, Wrench set
161 of 352 people found this instruction helpful.
Was this instruction helpful to you?
Thank you for voting!
dryer was not heating up
take off front bottom panel. use ohm tester on the heater coil element, (It had broken in back) remove screw holding it in place and the two red wires leading to the element. Pull out and replace. reinstall in reverse. Done
Other Parts Used:
Dryer Heating Element High Limit Thermostat and Thermal Cut-Off Kit
  • Michael from Rescue, CA
  • Difficulty Level:
    Really Easy
  • Total Repair Time:
    15 - 30 mins
  • Tools:
    Socket set
9 of 20 people found this instruction helpful.
Was this instruction helpful to you?
Thank you for voting!
Clothes would not Dry
I simply removed the back of the dryer to gain access to the heating element. Once I removed the heating element I figured I would also replace the thermostat and thermal fuse as preventive maintenance.
Other Parts Used:
High Limit Thermostat - L295-50F Dryer Heating Element High Limit Thermostat and Thermal Cut-Off Kit
  • Vince from Kathleen, GA
  • Difficulty Level:
    Easy
  • Total Repair Time:
    30 - 60 mins
  • Tools:
    Screw drivers, Socket set
88 of 124 people found this instruction helpful.
Was this instruction helpful to you?
Thank you for voting!
  • 1
  • 2
Questions and Answers

We're sorry, but our Q&A experts are temporarily unavailable.
Please check back later if you still haven't found the answer you need.

29 questions answered by our experts.
Sort by:
  • 1
  • 2
  • 3
Sorry, we couldn't find any existing answers that matched.Try using some different or simpler keywords, or submit your new question by using the "Ask a Question" button above!
Anthony Price
March 5, 2018
My Whirlpool duet dryer is not heating and there are no codes. The dryer did the whole cycle and the clothes were still wet. Could this be the heating element or is there another part that could be faulty? This is the first time my dryer has not worked since 2005. Thanks
For model number GEW9250PW0
PartSelect logo
Hello Anthony, thank you for your question. The first thing you will want to do is vacuum the inside of the unit around the element, the tumbler, the motor and the ducting. If there are not obstructions, and the unit continues to not heat. You will want to check the thermostats. There are a couple of them on the unit; Thermal Fuse Part Number: WP3392519, High Limit Thermostat and Thermal Fuse Kit Part Number: 279973, Thermostat, Internal-Bias Part Number: WP8577274, and the High Limit Thermostat - L295-50F Part Number: WP3391914. These can all be tested with a multimeter. Use a multimeter to test the thermostat's resistance by setting it to the RX 1 setting. Place each of the meter's probes onto the wire terminals. You should receive a reading of 0. Resistance that is low, or near 0, means that the electrical flow is good and the part does not need to be replaced. If the thermostats test as being in good condition and working properly, the element would be the issue. I hope this helps!

20 people found this helpful.

Was this helpful?
Thank you for voting!
Chris
November 18, 2017
Dryer heat was not working, so I ordered a new heating element and installed it, but there is no heat still. I checked continuity and there is nothing with the 2 connections to the element. What next? There are a bunch of wire harnesses but not sure where a fuse may be?
For model number MEDZ600TW2
PartSelect logo
Hello Chris, Thanks for your question. You will need to remove the bottom panel to gain access to the thermal cut-off fuse and high limit thermostat. I hope this helps.

8 people found this helpful.

Was this helpful?
Thank you for voting!
Dan
February 24, 2018
Have replaced the thermostat and fuse twice. High limit fuse was blown initially and when replaced both times. Dryer heated but fuse blows during first load. I cleaned all ducts and checked airflow on first replacement and again on second replacement. Air is flowing freely and heating element works. I watched heating element switch on and off when on low setting.
For model number GEW9250PW0
PartSelect logo
Hi Dan, Thank you for the question. If both the High Limit Thermostat and Thermal Fuse were replaced at the same time, I suggest testing the Thermostat, Internal-Bias Part Number, PS11746740 and the Thermal Fuse, Part Number: PS11741460. These parts are located on the blower housing and can be tested with a multi meter. They should be replaced at the same time. Same as the High Limit Thermostat and Thermal Fuse should also be replaced together. Hope this helps!

7 people found this helpful.

Was this helpful?
Thank you for voting!
Ken
July 19, 2019
I replaced the thermal fuse about six weeks ago. The dryer has been working but gets very hot. I don't think there is any low heat. What do i need to do to fix this? I also noticed that on the module plate in the under the top cover one of the mods (the first one on the front end seems chared. Is this a replaceable piece.Help! don't want to burn the house down. thank you!
For model number Whirlpool WED94HEXR0
PartSelect logo
Hello Ken, thank you for inquiring. Too much heat can indicate a defective Thermal Fuse part PS11741460 for your model. It could also be either the Internal-Bias Thermostat part PS11746740 or the High Limit Thermostat and Thermal Cut-Off Kit part PS334387 for your model. The other piece you are referring to is only sold as a part of the Console for your unit. Unfortunately the Console is discontinued and is no longer available. We have no known replacement information in our system. We recommend you contact Whirlpool directly to see if they have recently released a new substitute. Please feel free to get back in touch with us to place an order if they provide a substitution part number. Thank you.

4 people found this helpful.

Was this helpful?
Thank you for voting!
Marsha
September 12, 2019
My 4 1/2 year old Maytag dryer is not heating at all. I have had the vent checked and it is clear. I had an appliance repair guy out and he said he tested all the usual parts (fuses etc) and they all were good. He now says it has to be the mother board, which seems out of line for a 4 year old dryer. Could he be right?
For model number MEDB725BW0
PartSelect logo
Hi Marsha, Thank you for your question. If the technician you hired tested the usual parts and they checked out fine, it is possible that the electronic control board may be the issue. To verify if it is the part causing the issue, you will need to test the parts with a multimeter. Here is a link to one of our videos on YouTube that you may reference on how to use one, https://www.youtube.com/watch?v=bWC44fHn0As. I hope this helps. Thank you and have a great day!

2 people found this helpful.

Was this helpful?
Thank you for voting!
Alberto
August 11, 2017
Dryer shuts off and am getting a code 22.
For model number wed9550ww1
PartSelect logo
Hi Alberto, Thank you for the great question, This error Whirlpool uses to indicate the Thermistor shorted and needs to be replaced. Hope this helps !

2 people found this helpful.

Was this helpful?
Thank you for voting!
Related Parts:
Randal
March 7, 2019
Part i got for that model doesn't look the same. Only has two terminals for wires and mine has three on my highlimit cut off. Is it the wrong part?
For model number wed8000dw3
PartSelect logo
Hello Randal, thank you for your question. This kit is the recommended replacement for your specific model. However, the part has been substituted from the original. Per the manufacturer this kit will still work for your unit. I hope this helps!

2 people found this helpful.

Was this helpful?
Thank you for voting!
Rich
November 4, 2017
My dryer Whirlpool has f01 code and will not start. How do i put it in the diagnostic mode
For model number WED9400SW2
PartSelect logo
Hi Rich, Thank you for your inquiry. The F01 indicates a failed electronic machine control board. This error code can sometimes be caused by a glitch or power surge through the electrical lines. You may be able to clear this code by unplugging the washer for 5 minutes. Be sure to unplug the washer before accessing internal components. If this does not help you will need to replace the electronic control board. I hope this helps. Thank you and have a great day!

1 person found this helpful.

Was this helpful?
Thank you for voting!
John
January 27, 2018
I purchased p/n wpl 279973 and am trying to find an installation video.
For model number WED8300SW2
PartSelect logo
Hi John, Thank you for your question. It looks like we have an installation video posted underneath the part information. Here is the link for you: https://youtu.be/GDQLr2EXogo . Good luck with your repair.

1 person found this helpful.

Was this helpful?
Thank you for voting!
Richard
July 17, 2019
Good afternoon. My dryer would not start (although the lights came on) so I replaced the thermal fuse (WP3392519). The dryer started and worked for a day, then, as above would not start again. I checked the resistance on the fuse - there was no connectivity. There are no obstructions in the unit or the exit hose / vent. It was suggested that I replace the thermal cutoff with 279973. Prior to doing so, I tested the connectivity on the two parts. Both showed connectivity except when I heated the thermostat in an electric skillet. If 'clicked' off at 280 degrees Celsius. I have not checked the other part included in 279973 (another thermal fuse?) other than to verify that it has zero ohms of resistance. Not sure what else to check prior to replacing the 279973; however, the thermal cutoff is good, I would rather not spend the $50. Help? Next steps?
For model number YMEDE300VF1
PartSelect logo
Hi Richard, Thank you for your question. If you have not checked the other thermal fuse, I would check it with a multimeter to verify if it is working correctly. If the dryer is not starting there are some other parts you should also check as well to see if they are causing the issue. I would also check the door switch, the start switch, the motor, the electronic control board and the terminal block. I hope this helps. Thank you and have a great day!

1 person found this helpful.

Was this helpful?
Thank you for voting!
  • 1
  • 2
  • 3
You May Also Need ?
Model Cross Reference
This part works with the following models:
PartSelect Number: PS334387
Manufacturer Part Number: 279973
Brand
Model Number
Description
Kenmore
11060182000
Dryer
Kenmore
11060372710
Dryer - Dryer
Kenmore
11061062000
Dryer
Kenmore
11061064000
Dryer
Kenmore
11061066000
Dryer
Kenmore
11061082000
Dryer
Kenmore
11061084000
Dryer
Kenmore
11061086000
Dryer
Kenmore
11061092000
Dryer
Kenmore
11061112020
Dryer - Dryer
Kenmore
11061112021
Dryer - Dryer
Kenmore
11061112022
Dryer - Electric Dryer
Kenmore
11061632610
Dryer - ELECTRIC DRYER
Kenmore
11062182100
Dryer
Kenmore
11062182102
Dryer
Kenmore
11062182103
Dryer
Kenmore
11066002010
Dryer
Kenmore
11066152500
Dryer
Kenmore
11067022710
Dryer - COMMERCIAL
Kenmore
11067052600
Dryer
Kenmore
11067102310
Dryer - ELECTRIC DRYER
Kenmore
11068002010
Dryer
Kenmore
11068002011
Dryer - ELECTRIC DRYER
Kenmore
11068102310
Dryer - 27" ELECTRIC DRYER
Kenmore
11068103310
Dryer - ELECTRIC DRYER
Kenmore
11068132411
Dryer - ELECTRIC DRYER
Kenmore
11068132412
Dryer - ELECTRIC DRYER
Kenmore
11068133412
Dryer - ELECTRIC DRYER
Kenmore
11068133413
Dryer - ELECTRIC DRYER
Kenmore
11069082990
Dryer
Customer Service Representative

Get in touch, we're here to help!

Monday to Saturday
8am - 9pm EST

Contact Customer Service