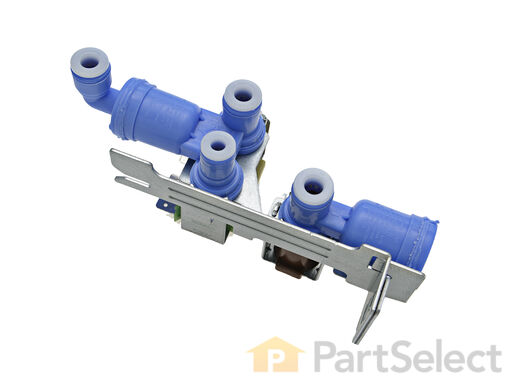
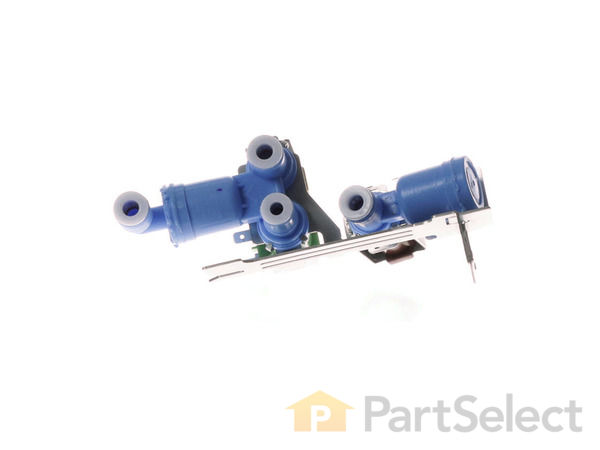
The function of the Refrigerator Water Inlet Valve (Triple Solenoid Water-Valve, Water Valve, Water Inlet Valve, Refrigerator Water Inlet Valve Assembly) is to release water from the supply line when activated, and send it through to your water dispenser or ice maker in your refrigerator. The water inlet valve is located at the back of the refrigerator, and connects to the water supply. The valve can break from material fatigue or normal use. If your water inlet valve is malfunctioning, you could be getting a lack of water to the inside of your refrigerator. Your ice maker may not produce cubes or your water dispenser may not work. The water inlet valve must be replaced if the solenoids no longer have continuity or the valve has internal blockage. This valve measures approximately 7 inches long and 4.5 inches wide, and is constructed of plastic and metal. It comes in blue, and includes the valve and mounting bracket.
Repair Tip: Before you begin this repair, make sure to disconnect the power supply to your refrigerator, and the inlet water supply from the back of the refrigerator. Note that this part may look different than the original, but is an authorized manufacturer replacem
Replacing your Frigidaire Refrigerator Refrigerator Water Inlet Valve
How to Troubleshoot a Refrigerator That Doesn't Make Ice
How Does an Ice Maker Work?
How to Troubleshoot an Ice Maker That is Not Working
Test If Your Electrical Part is Failing - Multimeter Tool
Troubleshooting
This part fixes the following symptoms:
Leaking | Ice maker not making ice | Not dispensing water | Ice maker won’t dispense ice
Keep searches simple. Use keywords, e.g. "leaking", "pump", "broken" or "fit".
Sorry, we couldn't find any existing reviews that matched. Try using some different or simpler keywords.
★★★★★
★★★★★
Raymond T - 5 days ago
Verified Purchase
Easy repair, perfect fit, great product!
Super easy to install and fits and works perfectly!
★★★★★
★★★★★
John O - May 2, 2024
Verified Purchase
repair replace
good part worked very good
★★★★★
★★★★★
Keith O - April 26, 2024
Verified Purchase
Easy repair. Part fit perfectly.
The part arrived very quick.
Easy to install. Works perfect like it was new.
I would order from again. If I have to. Nothing like buying original parts for something.
★★★★★
★★★★★
Colin P - February 28, 2024
Verified Purchase
Worked as expected
The part was in perfect condition and was an exact match to the old part.It has been working for a few weeks now.
★★★★★
★★★★★
Bradley B - December 17, 2023
Verified Purchase
Worked as advertised.
Good instructional video, installation was successful.
★★★★★
★★★★★
Timothy W - September 17, 2023
Verified Purchase
Right part, easy to replace
The part was an exact fit and was a text book replacement in reference to the on line coaching video. Highly recommended
★★★★★
★★★★★
James G - May 18, 2023
Verified Purchase
Easy repair
This part worked great for me
★★★★★
★★★★★
Robert W - May 17, 2023
Verified Purchase
Follow video and you’ll have no problem
View video and instructions were easy to follow and I had no problem with installing the valve.
★★★★★
★★★★★
Jon H - April 8, 2023
Verified Purchase
Great service!
Part came quick and worked well.
★★★★★
★★★★★
Erich S - March 27, 2023
Verified Purchase
Easy Repair
The part is working fine. Everything is back normal.
< Prev
1
2
3
Next >
Customer Repair Stories
Average Repair Rating: 3.9 / 5.0, 63 reviews.
What's this?
Sort by:
< Prev
1
2
3
Next >
Search filter:
Clear Filter
Your search term must have 3 or more characters.
Keep searches simple. Use keywords, e.g. "leaking", "pump", "broken" or "fit".
Sorry, we couldn't find any existing installation instruction that matched.
valve was leaking
New valve is push fittings while old valve is threaded directions don't tell you but cut the tubing and it will match up correctly
Watched the video on your website and you can’t go wrong. Thanks for being there Mike
Michael from Double springs, AL
Difficulty Level:
Very Easy
Total Repair Time:
Less than 15 mins
Tools:
Nutdriver, Pliers, Wrench (Adjustable)
1 personfound this instruction helpful.
Was this instruction helpful to you?
Thank you for voting!
Doesn't make ice / doesn't dispense ice
Removed and replace solenoid manifold valve in rear of appliance using inadequate You Tube video. Removed and replaced augur motor after dismantling various housings using a seriously mistaken You Tube video. The latter video informed us that the yoke that screwed on the motor's shaft was a reversed Left Hand thread. It wasn't at all,
... Read more and we struggled to figure that out. The people that make these videos leave out steps that they thunk are obvious, but aren't at all.
During cross country move, water valve froze and broke.
Straight forward repair. Remove the four screws holding cardboard back. Remove the 2 screws holding the valve. Unscrew the water lines and unplug the electrical connections. I would caution that it would be wise to either take a couple photos or write down the order of connection. Even though it is somewhat color coded and the water lines
... Read more are different sizes, a photo removes any confusion. My old valve had threaded connections using brass nuts and ferrules. The new valve has push in connections so you need to cut the ferrules off.. When cutting off the tubing, be sure to cut square. An angled or "squished" cut will leak when pushed into the fitting. Attach the valve to the refrigerator with 2 screws and replace the cardboard back and you're finished. While you have the back off is a good time to clean the coils. I left my fridge out and back off for a couple of ice making cycles so I could check for leaks (how I know the tubing needs to be cut very square). All in all, a very easy fix.
Read less
Eldon from HALLAM, NE
Difficulty Level:
Easy
Total Repair Time:
15 - 30 mins
Tools:
Nutdriver, Pliers, Wrench (Adjustable)
1 personfound this instruction helpful.
Was this instruction helpful to you?
Thank you for voting!
LEAKING WATER valve
very easy, make sure to watch the provided you tube video.
Rene from DIAMOND BAR, CA
Difficulty Level:
Really Easy
Total Repair Time:
30 - 60 mins
Tools:
Nutdriver, Pliers, Wrench (Adjustable)
2 of 2 peoplefound this instruction helpful.
Was this instruction helpful to you?
Thank you for voting!
There was no problem with the installation just finding out what was wrong with it not making ice
Original unit had screw on lugs. After removing old unit, I unscrewed the lugs, cut the lines to remove the nuts and inserted them into the new unit. Everything was color coded so connection was simple. Reinstalled unit, cycled the ice maker several times only to discover the fill tube at in the freezer had frozen ice blocking the tray f
... Read morerom getting water. Used a hair dryer to thaw out the tube, water flowed instantly. Very easy repair.
Read less
John A from BRUNSWICK, GA
Difficulty Level:
Very Easy
Total Repair Time:
Less than 15 mins
Tools:
Screw drivers, Wrench (Adjustable)
2 of 2 peoplefound this instruction helpful.
Was this instruction helpful to you?
Thank you for voting!
I let value was leaking its self
Undo a few bolts unplug power and unhook water lines then recut all lines and push in to new value
Mitchell from FOXWORTH, MS
Difficulty Level:
Very Easy
Total Repair Time:
Less than 15 mins
Tools:
Wrench (Adjustable)
1 personfound this instruction helpful.
Was this instruction helpful to you?
Thank you for voting!
No water to ice maker
Repair was easy. Unplug refrigerator, turn off water to ice maker, remove back panel, disconnect water inlet valve, disconnect water supplies and electrical connections. Cut ends off tubing to modify to new part connections, connect tubing, connect electrical supplies, reinstall back panel, plug refrigerator in, turn water supply back o
... Read moren. We made sure that there was no ice build up in the supply tube into the ice maker and made sure that everything worked correctly before putting it all back together. It was an easy repair.
Read less
Joel from SODUS POINT, NY
Difficulty Level:
Really Easy
Total Repair Time:
30 - 60 mins
Tools:
Nutdriver, Wrench (Adjustable)
1 of 2 peoplefound this instruction helpful.
Was this instruction helpful to you?
Thank you for voting!
Valve body separated : major leak.
Write down where tubing goes, wiring is color coded.
Robert from NASHVILLE, TN
Difficulty Level:
Really Easy
Total Repair Time:
15 - 30 mins
Tools:
Nutdriver
1 personfound this instruction helpful.
Was this instruction helpful to you?
Thank you for voting!
< Prev
1
2
3
Next >
Questions and Answers
We're sorry, but our Q&A experts are temporarily unavailable.
Please check back later if you still haven't found the answer you need.
189 questions answered by our experts.
Sort by:
< Prev
1
2
3
Next >
Search filter:
Clear Filter
Your search term must have 3 or more characters.
Keep searches simple. Use keywords, e.g. "leaking", "pump", "broken" or "fit".
Sorry, we couldn't find any existing answers that matched.Try using some different or simpler keywords, or submit your new question by using the "Ask a Question" button above!
Brian
April 16, 2018
Ice maker works but no water out of front. Took apart and actuator is clicking against the electronic part like its supposed to. How can i be sure the issue is the inlet valve before i spend $50 on it?
For model number FFHS2312NS3
Hi Brian,
Thank you for your question. To verify if the water inlet valve is causing the issue, you will need to test it with a multimeter. Before you begin to test your icemaker's water inlet valve, make sure you disconnect the appliance's power supply. The easiest way to do this is to unplug the unit from the wall. Alternatively, you could trip the appropriate switch in the circuit breaker panel, or you could remove the appropriate fuse from your home's fuse box. Consult with an appliance repair technician if you do not feel you have the skill or the ability to successfully complete this test. Locate your icemaker's water inlet valve, it is typically located behind a refrigerator. Gently pull your refrigerator away from the wall. You may want to place scraps of carpet, of some other soft material below the fridge to prevent damage to the floor. Turn of the water valve's water supply by closing the shut-off valve in the waterline leading to the water valve. Remove the lower access panel on the back of the refrigerator using a screwdriver or a nut driver. Place a container under the valve to catch any water that may spill from the water valve and its fill tube. Remove the water valve's fill tubing. Loosen the flare nut on the brass fitting that is found on the inlet side of the water valve. You can use a wrench to loosen the flare nut. Your water inlet valve is held in place on your refrigerator by means of a metal bracket. Use a screwdriver or a nutdriver to remove the screw that holds the water valve's bracket to the refrigerator cabinet. Gently pull the water valve out of the cabinet, and remove the tube from the outlet port. There are two wires connecting to the terminals of your water inlet valve. If yours is a double solenoid water valve, it will have four wires. Be sure to label each wire so that you know where to reconnect them later. Firmly grasp the metal connector of the wires in order to remove the wires. You may need to use a pair of needle-nosed pliers. Do not pull on the wires themselves.
Set your multitester to the R X 1 ohms setting to test for continuity. Place each of the multitester's leads on a terminal. Your multitester should display a reading between 200 and 500 ohms. Closely examine your water inlet valve. The exact ohm resistance rating you should test for may be marked on the valve. If the test you conduct with your icemaker water inlet valve does not produce these results, then you should replace the component. I hope this helps. Thank you and have a great day!
84 people found this helpful.
Was this helpful?
Thank you for voting!
Kory
July 20, 2017
Was having problems with a faulty water valve so I replaced it but now it seems to dispense water every half hour or so without anyone hitting the dispenser. I know if water is leaking out of the icemaker assembly that usually means a faulty water valve but how about out of the water dispenser itself?
Hi Kory, it sounds like you need to replace the diode kit, you can find that here 5303918287. I hope this helps.
46 people found this helpful.
Was this helpful?
Thank you for voting!
Jacques
October 10, 2017
How to test ice water valve or verified ice water valve if its good. Thanks
For model number FRS6R5ESBB
Hi Jacques,
Thank you for your question. You can test the solenoids on your valve with a multi meter. When testing your part, your solenoids should read any where between 500 and 1500 ohms of resistance. If it does not, or if your meter numbers do not shift at all, then you will need to replace your part. Good luck with your repair.
25 people found this helpful.
Was this helpful?
Thank you for voting!
Van
July 20, 2017
My valve is malfunctioning and needs to be replaced. If I order this part, do I need any extra attachments or are there additional parts I should order, or is this it?
Hello Van, no, additional parts are not needed for this repair. Make sure when installing the new valve that the lines are cut flat. Best of luck with this repair!
19 people found this helpful.
Was this helpful?
Thank you for voting!
Jay
January 14, 2019
The water dispenser will not stop dispensing water after i have stopped pressing it. Also, water is leaking down the back of the inside of the refrigerator at the filter.
For model number FFHS2622MBQA
Hello Jay, Thank you for the question. I suggest checking or replacing the Water Inlet Valve, PartSelect Number: PS7784018. Sounds like it is stuck open and allowing water to flow to the dispenser and overfill the filter causing the leak. Thank you for your inquiry, good luck with this repair!
17 people found this helpful.
Was this helpful?
Thank you for voting!
Chris
January 22, 2019
My ice maker makes ice, but when water is dispensed into the ice tray it overflows into the ice holder then out front of frig. Why is it overflowing?
For model number FFHS2622MYSA
Hello Chris, Thank you for the question. The most common issue would be the water inlet valve becoming stuck open and not closing properly and causing the ice maker to over flow. Sounds like your valve is defective and needs to be replaced. Thank you for your inquiry, good luck with this repair!
17 people found this helpful.
Was this helpful?
Thank you for voting!
Ernie
February 18, 2018
Won't dispense water into icemaker. Checked the inlet valve and its pulling about 200 ohms. Also ice maker won't dump ice into the bucket. It seemed to be frozen so i thawed it out and put water in it. Still won't dump ice.
For model number FRS6LR5EW6
Hello Ernie, thank you for your question. It sounds like the water valve is not functioning properly. When testing the valve, your solenoids should read any where between 500 and 1500 ohms of resistance. If it does not, or if your meter numbers do not shift at all, then you will need to replace your Valve. I hope this helps!
16 people found this helpful.
Was this helpful?
Thank you for voting!
Jason
December 3, 2018
Is this made by the original manufacturer? In other words is this "real" or a "knock off" aftermarket version.
For model number 242252702
Hello Jason, thank you for your question. This is a real manufacturer made part. It is not aftermarket, as we don't sell aftermarket parts. I hope this helps.
14 people found this helpful.
Was this helpful?
Thank you for voting!
Laura
December 6, 2017
Water very slow
For model number FGUS2642LF1
Hi Laura, Thank you for the question. The slow water flow could be two things. I would first check the water filter. If it has not been changed in the last 6 months it can cause a blockage and slow water. If the filter is good the water inlet valve will need to be replaced. Hope this helps!
Icemaker assembly is leaking out water. Is that from the icemaker or the water valve not shutting?
Hi Malaya, it does sound like the valve is not shutting off fast enough. We recommend first checking the gear on the icemaker. If it is good then the valve is the problem. Please let us know if you have any further questions.