Keep searches simple. Use keywords, e.g. "leaking", "pump", "broken" or "fit".
Sorry, we couldn't find any existing reviews that matched. Try using some different or simpler keywords.
★★★★★
★★★★★
M D - February 6, 2023
Verified Purchase
Quality part
Well packaged, comes with the temp sensors installed, plug and play setup
★★★★★
★★★★★
Robert C - January 26, 2022
Verified Purchase
Great part small workspace
The part took about 6 days to get. That was not a problem. I live in a small 2 bedroom condo with the combo washer and dryer stack wedged into a little closet. The part worked great . The washer/dryer unit was a nightmare to get apart especially with the limited space.
★★★★★
★★★★★
Charles A - January 9, 2022
Verified Purchase
Worked but hard to install
Same as above
★★★★★
★★★★★
Sally S - May 28, 2019
Verified Purchase
easy to install
works like a charm so glad to ave my dryer back
★★★★★
★★★★★
Don A - April 15, 2019
Verified Purchase
Heating Coil assembly
Great value and fairly simple installation. Make more sense than buying a whole dryer , part should come with new drum screws , mine cane out allowing the drum to drop on the coil therefore shorting out .
★★★★★
★★★★★
Edwin R - December 20, 2018
Verified Purchase
Easy to install, no issues
No comment
★★★★★
★★★★★
ERIC C - December 7, 2018
Verified Purchase
fixed
part took care of the problem. shipment arrived several days after promised time
★★★★★
★★★★★
Gregory S - November 28, 2018
Verified Purchase
Worked as expected, PartSelect service is good
I am not a repairman and have no experience with the R and R of the part. Description of the steps to remove and replace the part would have been helpful. A diagram or YouTube demonstration would have been great.
★★★★★
★★★★★
Robert M - August 1, 2018
Verified Purchase
Simple and not very time consuming repair
The part was a perfect replacement for the bad one and went together without any problems and works perfectly!!
★★★★★
★★★★★
John F - March 12, 2018
Verified Purchase
Easy repair
The part worked very well
< Prev
1
Next >
Customer Repair Stories
Average Repair Rating: 2.4 / 5.0, 8 reviews.
What's this?
Sort by:
< Prev
1
Next >
Search filter:
Clear Filter
Your search term must have 3 or more characters.
Keep searches simple. Use keywords, e.g. "leaking", "pump", "broken" or "fit".
Sorry, we couldn't find any existing installation instruction that matched.
DRYER MADE A LOT OF NOISE
Took the top dryer cabinet apart to replace all the above parts plus the dryer belt. Because of its age decide to replace all the parts from the above list. Three major problems: none of the video reviews showed this type of dryer. Some parts were practically impossible to get back together. Difficult getting the top square. The top
... Read more of the cabinet picture did not indicate how the top was to be installed. After 23 hours finally got it back together. Then it would not start. Discovered a wire had come loose. The dryer works fine now.
Removed top cover. Lowered control assembly. Removed front door assembly. Removed drum. Removed heater assembly. Removed support bearing and bracket using existing bonding ball. Re-assembled in reverse order.
Don’t do like I did and undo the drummer from the back of that thing pulled off the bearing
Van from BLUFFDALE, UT
Difficulty Level:
Easy
Total Repair Time:
1- 2 hours
Tools:
Nutdriver, Screw drivers
2 of 2 peoplefound this instruction helpful.
Was this instruction helpful to you?
Thank you for voting!
Replaced burned out heating element
Not having the repair manual made the repair more difficult. Prior experience made the job somewhat easy. Had to study every move to make sure no parts were not broken but overall the repair went without any problems. I found out that the bearing plate was removable to facilitate removal and replacement of the heating element. Advise
... Read moreif you are doing a repair of an appliance you don't know much about, take your time and everything should go well for you.
I watched the video you had. Did what the man said, checked out the parts, and orded the new ones. Then installed , as per video. It was Fun.
ricky from okeechobee, FL
Difficulty Level:
Easy
Total Repair Time:
1- 2 hours
Tools:
Screw drivers
1 of 3 peoplefound this instruction helpful.
Was this instruction helpful to you?
Thank you for voting!
Had a professional do the install. He had difficulty aligning the cabinet so that it did not rub against the dryer drum. The parts you mailed me worked fine and resolved the problem. Thanks. Even having to pay the installer saved me 50% on the total job.
Installer unscrewed the screws on the upper panel, loosened the pulley holding the rubber drum cable, and pulled the drum up and out of the unit. With the rear heating element exposed, he unplugged the wire connections to the heating element, unscrewed the four screws holding the element to the rear panel and took the element out. Then
... Read morehe installed the new heating element by re-applying the four screws into the rear panel. He then replaced the thermal limiter which was directly at the right of the heating element by unplugging the wire connections to the thermal limiter and then unscrewing the thermal limiter from the rear panel. The process to install the new thermal limiter was the reverse process. He didn't install a new High Limit Thermostat because there was one attached to the new Heater. When all the new parts were installed, he reinstalled the drum by pushing the rear nub of the drum into the whole at the center of the heating plate. He then placed the rubber drum cable around the drum with the rough service facing the drum, placed the cable on the pulley and adjusted the tension of the cable with a screw driver. He then reinstalled the front panel by aligned the screw holes and reinserting and tightening the screws.
Had to remove tub to get to rear wall to make the repair and then put it back together in reverse order.
CAROLE from MONTICELLO, AR
Difficulty Level:
A Bit Difficult
Total Repair Time:
1- 2 hours
Tools:
Nutdriver, Pliers, Screw drivers
53 of 79 peoplefound this instruction helpful.
Was this instruction helpful to you?
Thank you for voting!
dryer wouldn't heat
First: Remove front and top cover Second: remove electrical cover assbly Third: motor belt removed Fourth: drum assbly and bearing shaft and bracket bearing replaced Now I need urgently (already ordered) the thermostat and glide drum
We're sorry, but our Q&A experts are temporarily unavailable.
Please check back later if you still haven't found the answer you need.
12 questions answered by our experts.
Sort by:
< Prev
1
2
Next >
Search filter:
Clear Filter
Your search term must have 3 or more characters.
Keep searches simple. Use keywords, e.g. "leaking", "pump", "broken" or "fit".
Sorry, we couldn't find any existing answers that matched.Try using some different or simpler keywords, or submit your new question by using the "Ask a Question" button above!
Gene
February 11, 2018
Does high level thermostat (ps446428) come with heater assembly ps2378363? I'm not sure if high level thermostat is ok.
For model number GLET1041AS2
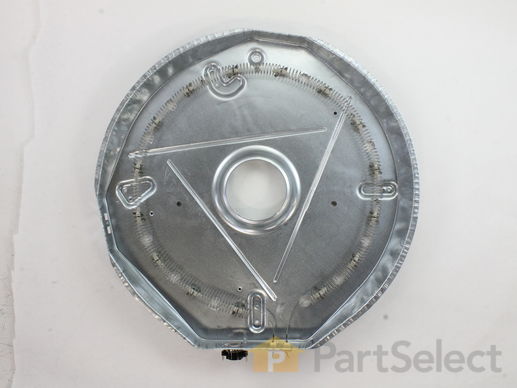
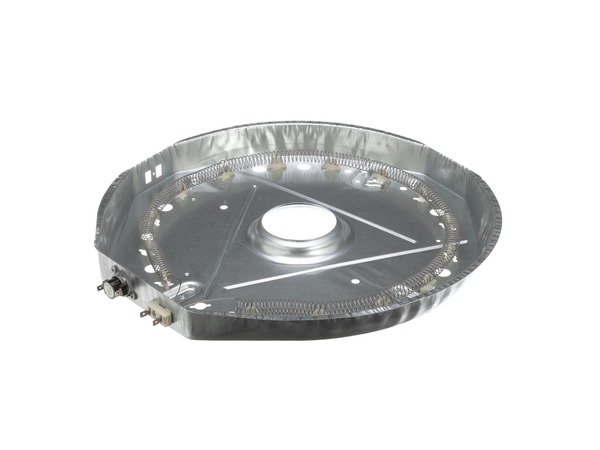
Hello Gene, Thank you for the question. Yes the High Limit Thermostat that is at the top of the element in the picture comes with the new element. Good luck with the repair!
3 people found this helpful.
Was this helpful?
Thank you for voting!
Mark
October 2, 2017
Does this part come with the thermostat that is in the picture? Thank you.
For model number GLEH1642DS1
Hi Mark, Thank you for the question. Yes the High Limit Thermostat that is at the top of the element in the picture comes with the new element. Good luck with the repair!
3 people found this helpful.
Was this helpful?
Thank you for voting!
Paul
February 25, 2020
Dryer will not heat up is the heater element the answer
For model number 41794812301
Hi Paul,
Thank you for your question. If the dryer is not heating up, there are some parts that you will need to check to see which one is causing the issue. You will need to check the heating element, the thermal limiter, the high limit thermostat, the cycling thermostat, the cover assembly and moisture sensor and the electronic control board. You will need to test the parts with a multi-meter. Here is a link to one of our videos on YouTube that you may use as a general reference on how to use one, https://www.youtube.com/watch?v=bWC44fHn0As. To check the electronic control board, you will need to inspect it for signs of damage, wear or burn marks. If it shows any of these signs, it will need to be replaced. If it is the electronic control board causing the issue, part number 134216300, it has been discontinued by Frigidaire and you will need to contact them for information on a replacement part. Their telephone number is 1-800-374-4432 extension 0. If they provide you with a part number for the replacement part, you may call us back with it and we can verify if we have it available for you. You may also be able to locate the part you need by trying the following:
Using a search engine to type your part number and see if other retailers still have this part in stock.
Visiting online stores such as eBay and finding sellers that have this part.
Trying retailers and repair stores in your local area to see if they have the part in their inventory.
Talking to a local repair technician, who may have the part you need, or may be able to repair your existing part. If you are unable to find one through these methods, there is a company called Circuit Board Medics that may be able to repair it for you. Their telephone number is 1-800-547-2049. We hope this helps. Thank you and have a great day.
2 people found this helpful.
Was this helpful?
Thank you for voting!
Jerry
August 2, 2018
Are there any instructions available to aid in the installation of the new heating element.. ?
Hi Jerry,
Thank you for your question. There is a video on our website that you can reference on how to install the heating element. The the dryer in the video may not show exactly like the one you have, but it will give you a general idea on how to install the part. You will find the video under part number PS418120. Also, here is the link to the video, https://www.partselect.com/PS418120-Frigidaire-131553900-Heating-Element-Assembly.htm?SourceCode=3&SearchTerm=131553900. I hope this helps. Thank you and have a great day!
1 person found this helpful.
Was this helpful?
Thank you for voting!
Sally
May 6, 2019
Takes forever to dry anything...very low heat...do you think i need the whole heater assembly or just the heater coil...in your opinion..thank you
For model number 417.98702891
Hi Sally,
Thank you for your question. If the dryer is not heating as it should, there are some parts that you will need to check to see which one is causing the issue. You will need to check the heating assembly, the thermostat, the thermal limiter and the timer. If it turns out to be the heater assembly, the coil is available separately. The part number listed under your model number for the coil is PS451032. I hope this helps. Thank you and have a great day!
1 person found this helpful.
Was this helpful?
Thank you for voting!
Paul
January 27, 2022
SERIAL # XE90401404
I'm only getting partial heating. Top of the back of the dryer is very hot bottom no heat. Do I need a new heater?
For model number FEX831FS2
Hello Paul, thank you for your question. Not necessarily. We recommend trying Thermal Limiter - Limit 220 PartSelect Number PS419402 first. We have an installation video for you to access. Then try just the element PartSelect Number PS451032. We hope to hear from you soon.
Does the heater assembly come with high limit thermostat?
For model number FLSE60RGS1
Hello Steve thank you for your question. Yes the High Limit Thermostat will come with that assembly. Good luck with the repair!
1 person found this helpful.
Was this helpful?
Thank you for voting!
Donald
April 4, 2022
Dryer is getting very hot. When door is opened while running the coil in the back is cherry red and little sparks fall off of coil. Is this caused by a bad element or?
For model number FEX831CS0
Hello Donald, Thank you for the question. We suggest testing the thermostats with a Multimeter to see if they are faulty and allowing the appliance to over heat. If you need help placing an order, customer service is open 7 days a week. Please feel free to give us a call. We look forward to hearing from you!
kenmore dryer 970-c90802-00 video on heating element 131475320.. can you send me the video We are so distort as we can not find it
For model number kenmore dryer 970-c90802-00 video on heating element 131475320
Hi Maria, thank you for contacting us. We have attached a relevant video, which may not be of the exact model but will help you with the process. We hope this helps.
Was this helpful?
Thank you for voting!
Christopher
November 23, 2019
What other parts are advised to replace with a heating element
For model number 41797812701
Hi Christopher, referring to model 41797812701, I am unsure what you are referring to. Do you have a specific symptom with your fridge you are trying to fix? Thank you for your question and good luck with your repair!